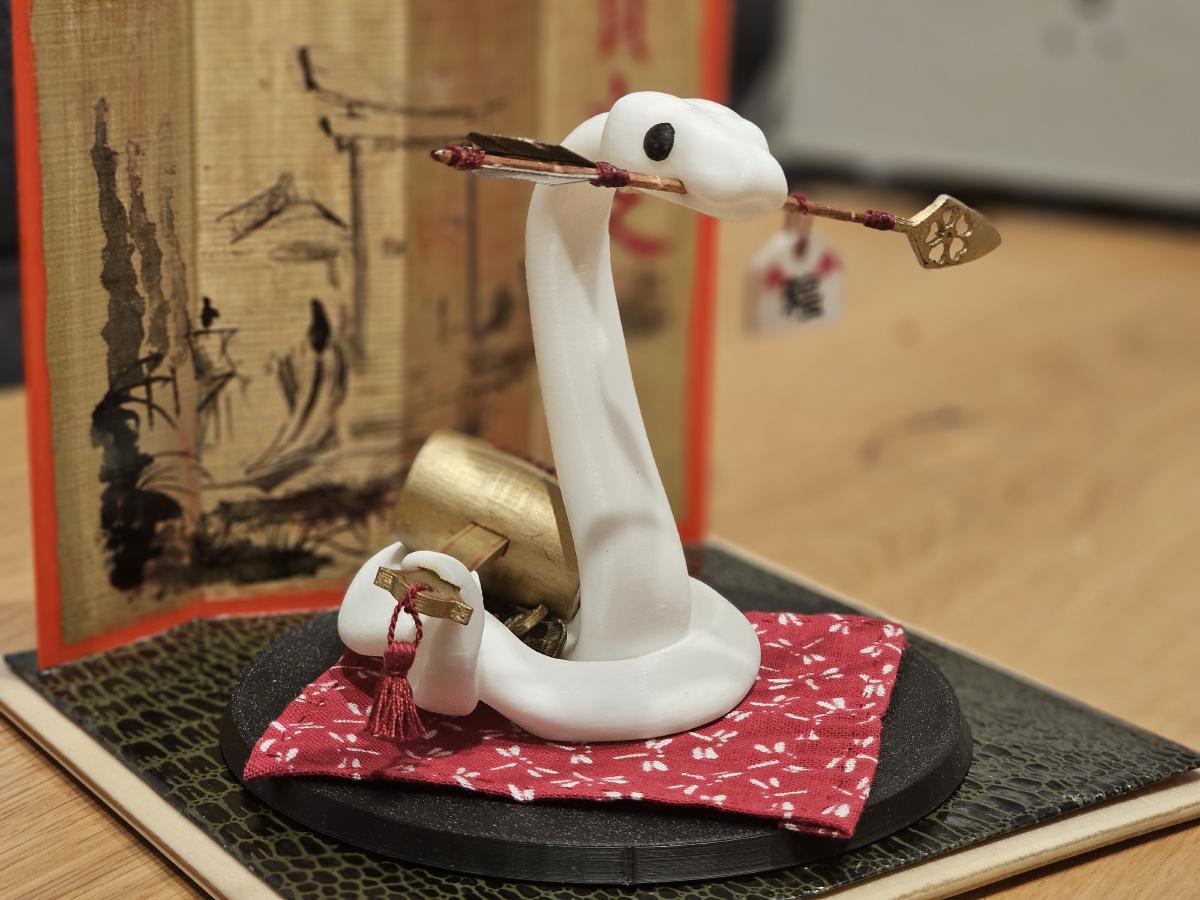
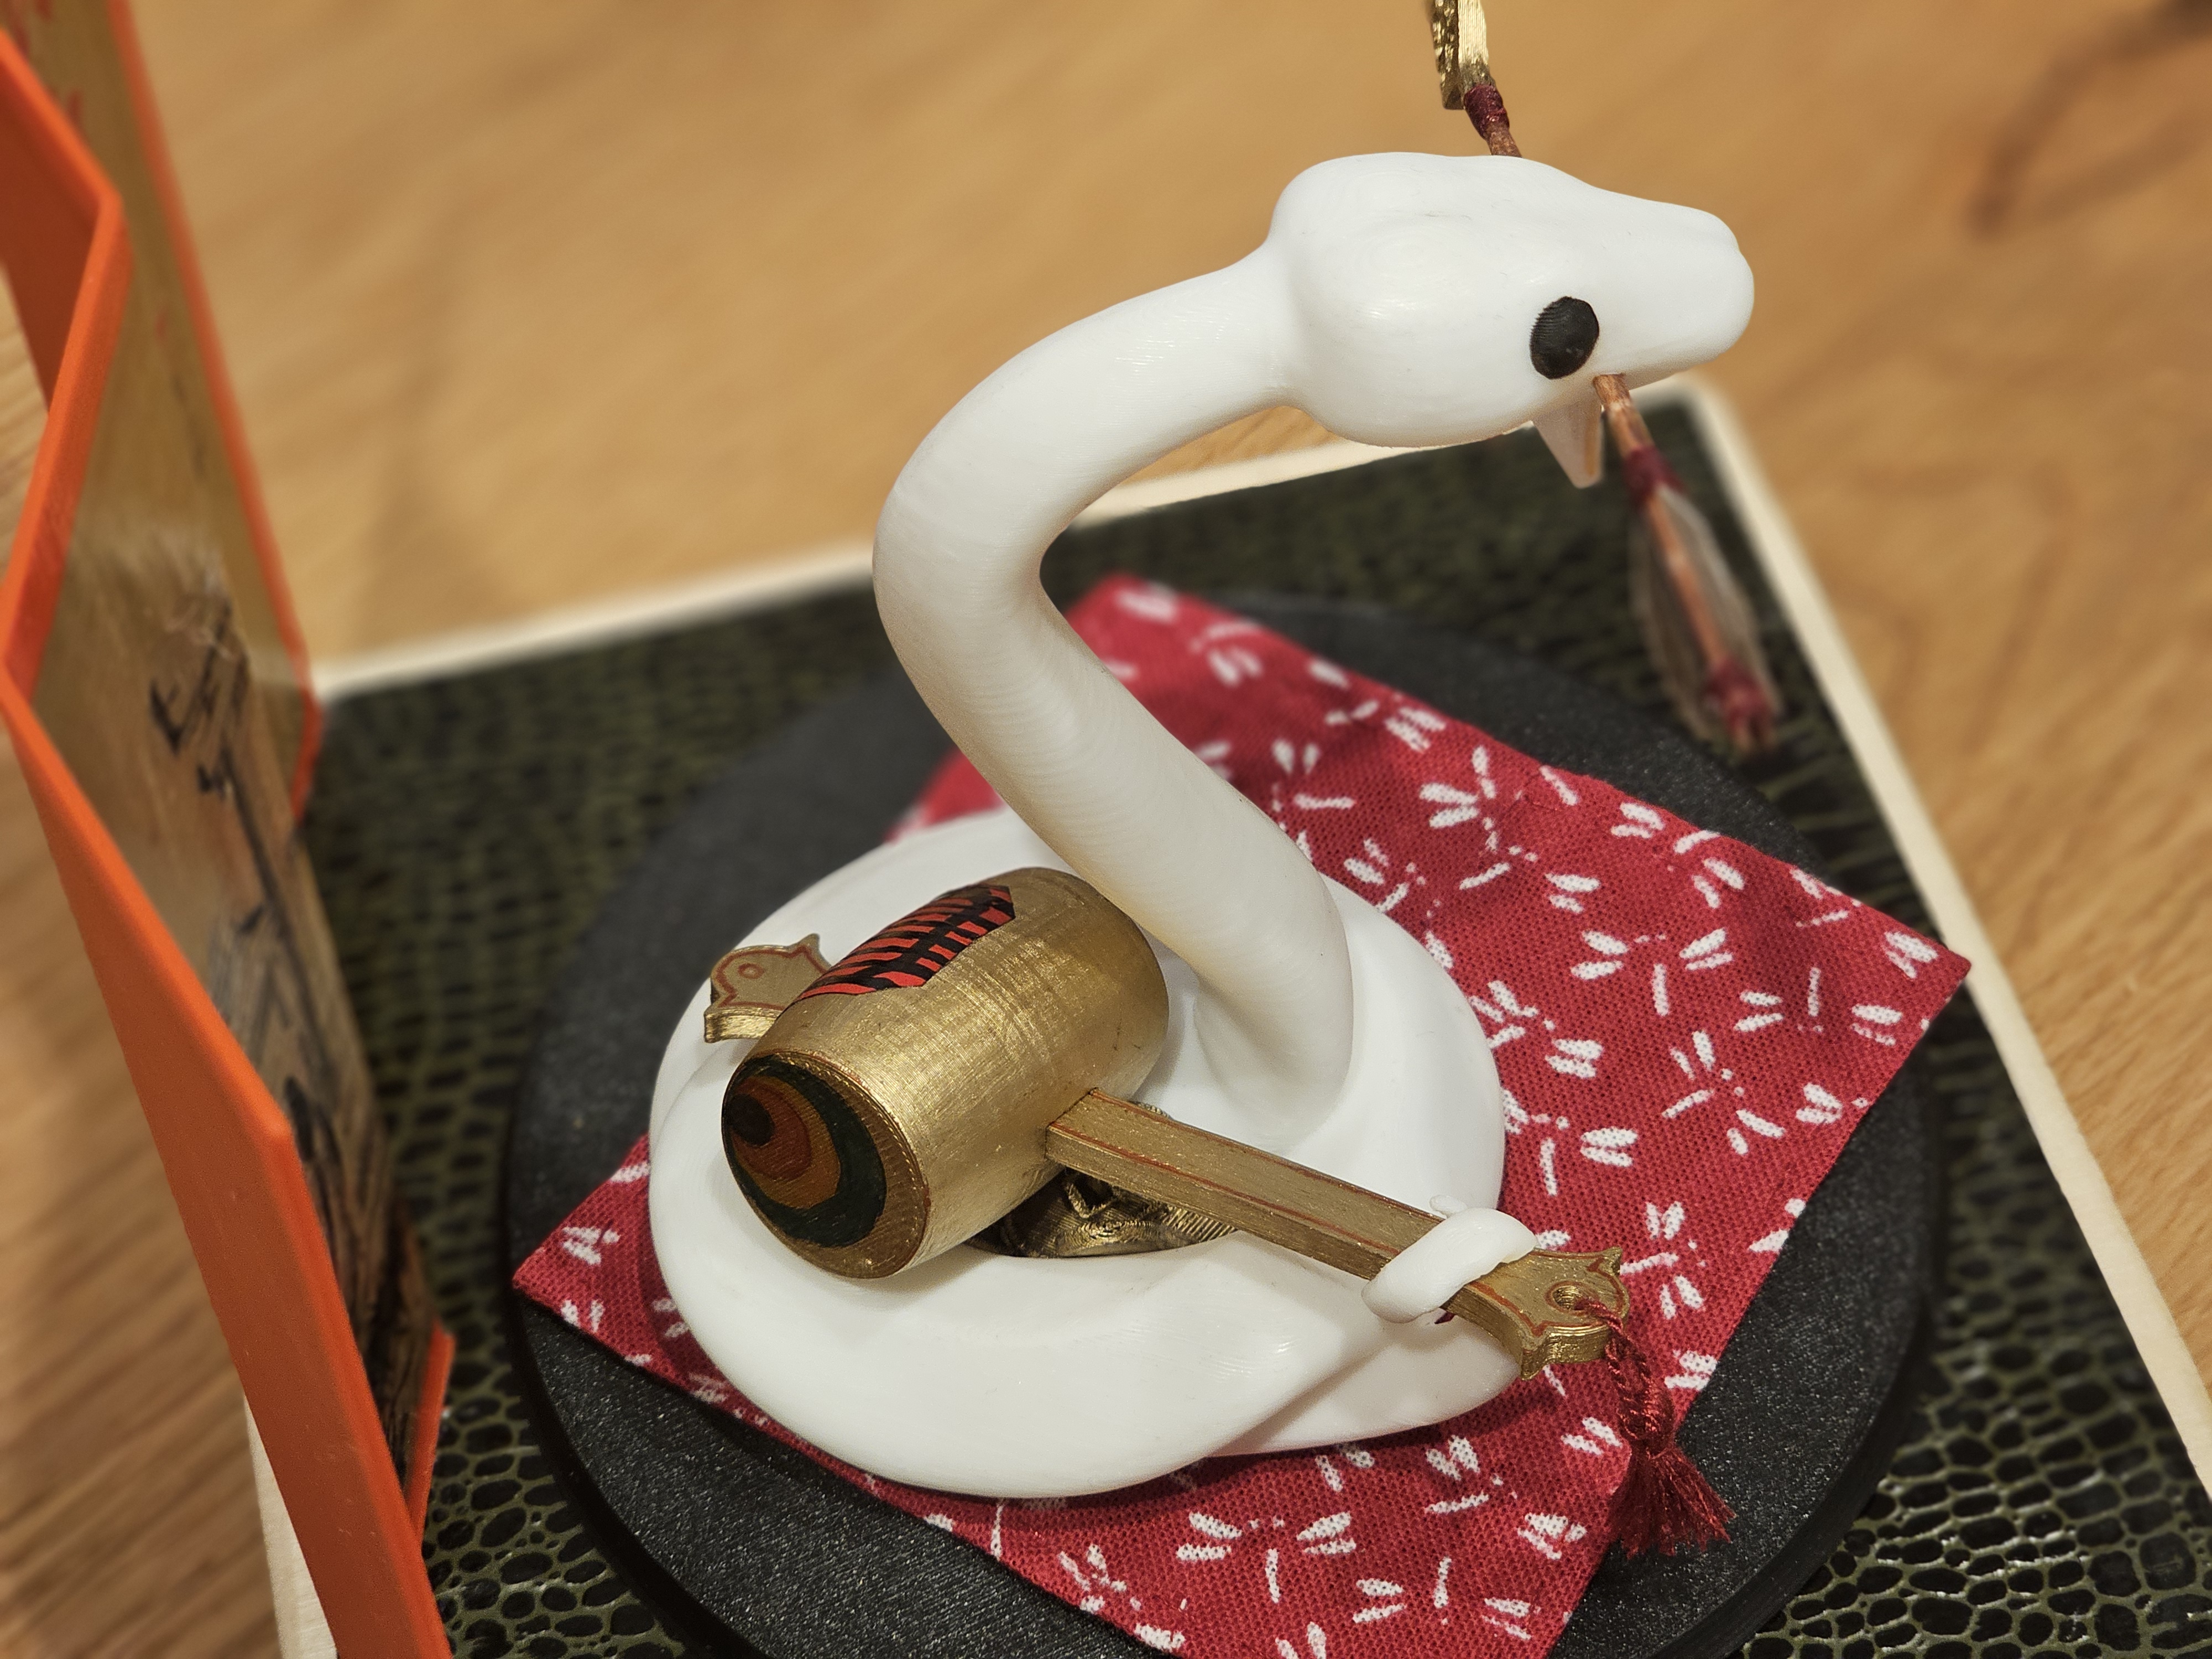
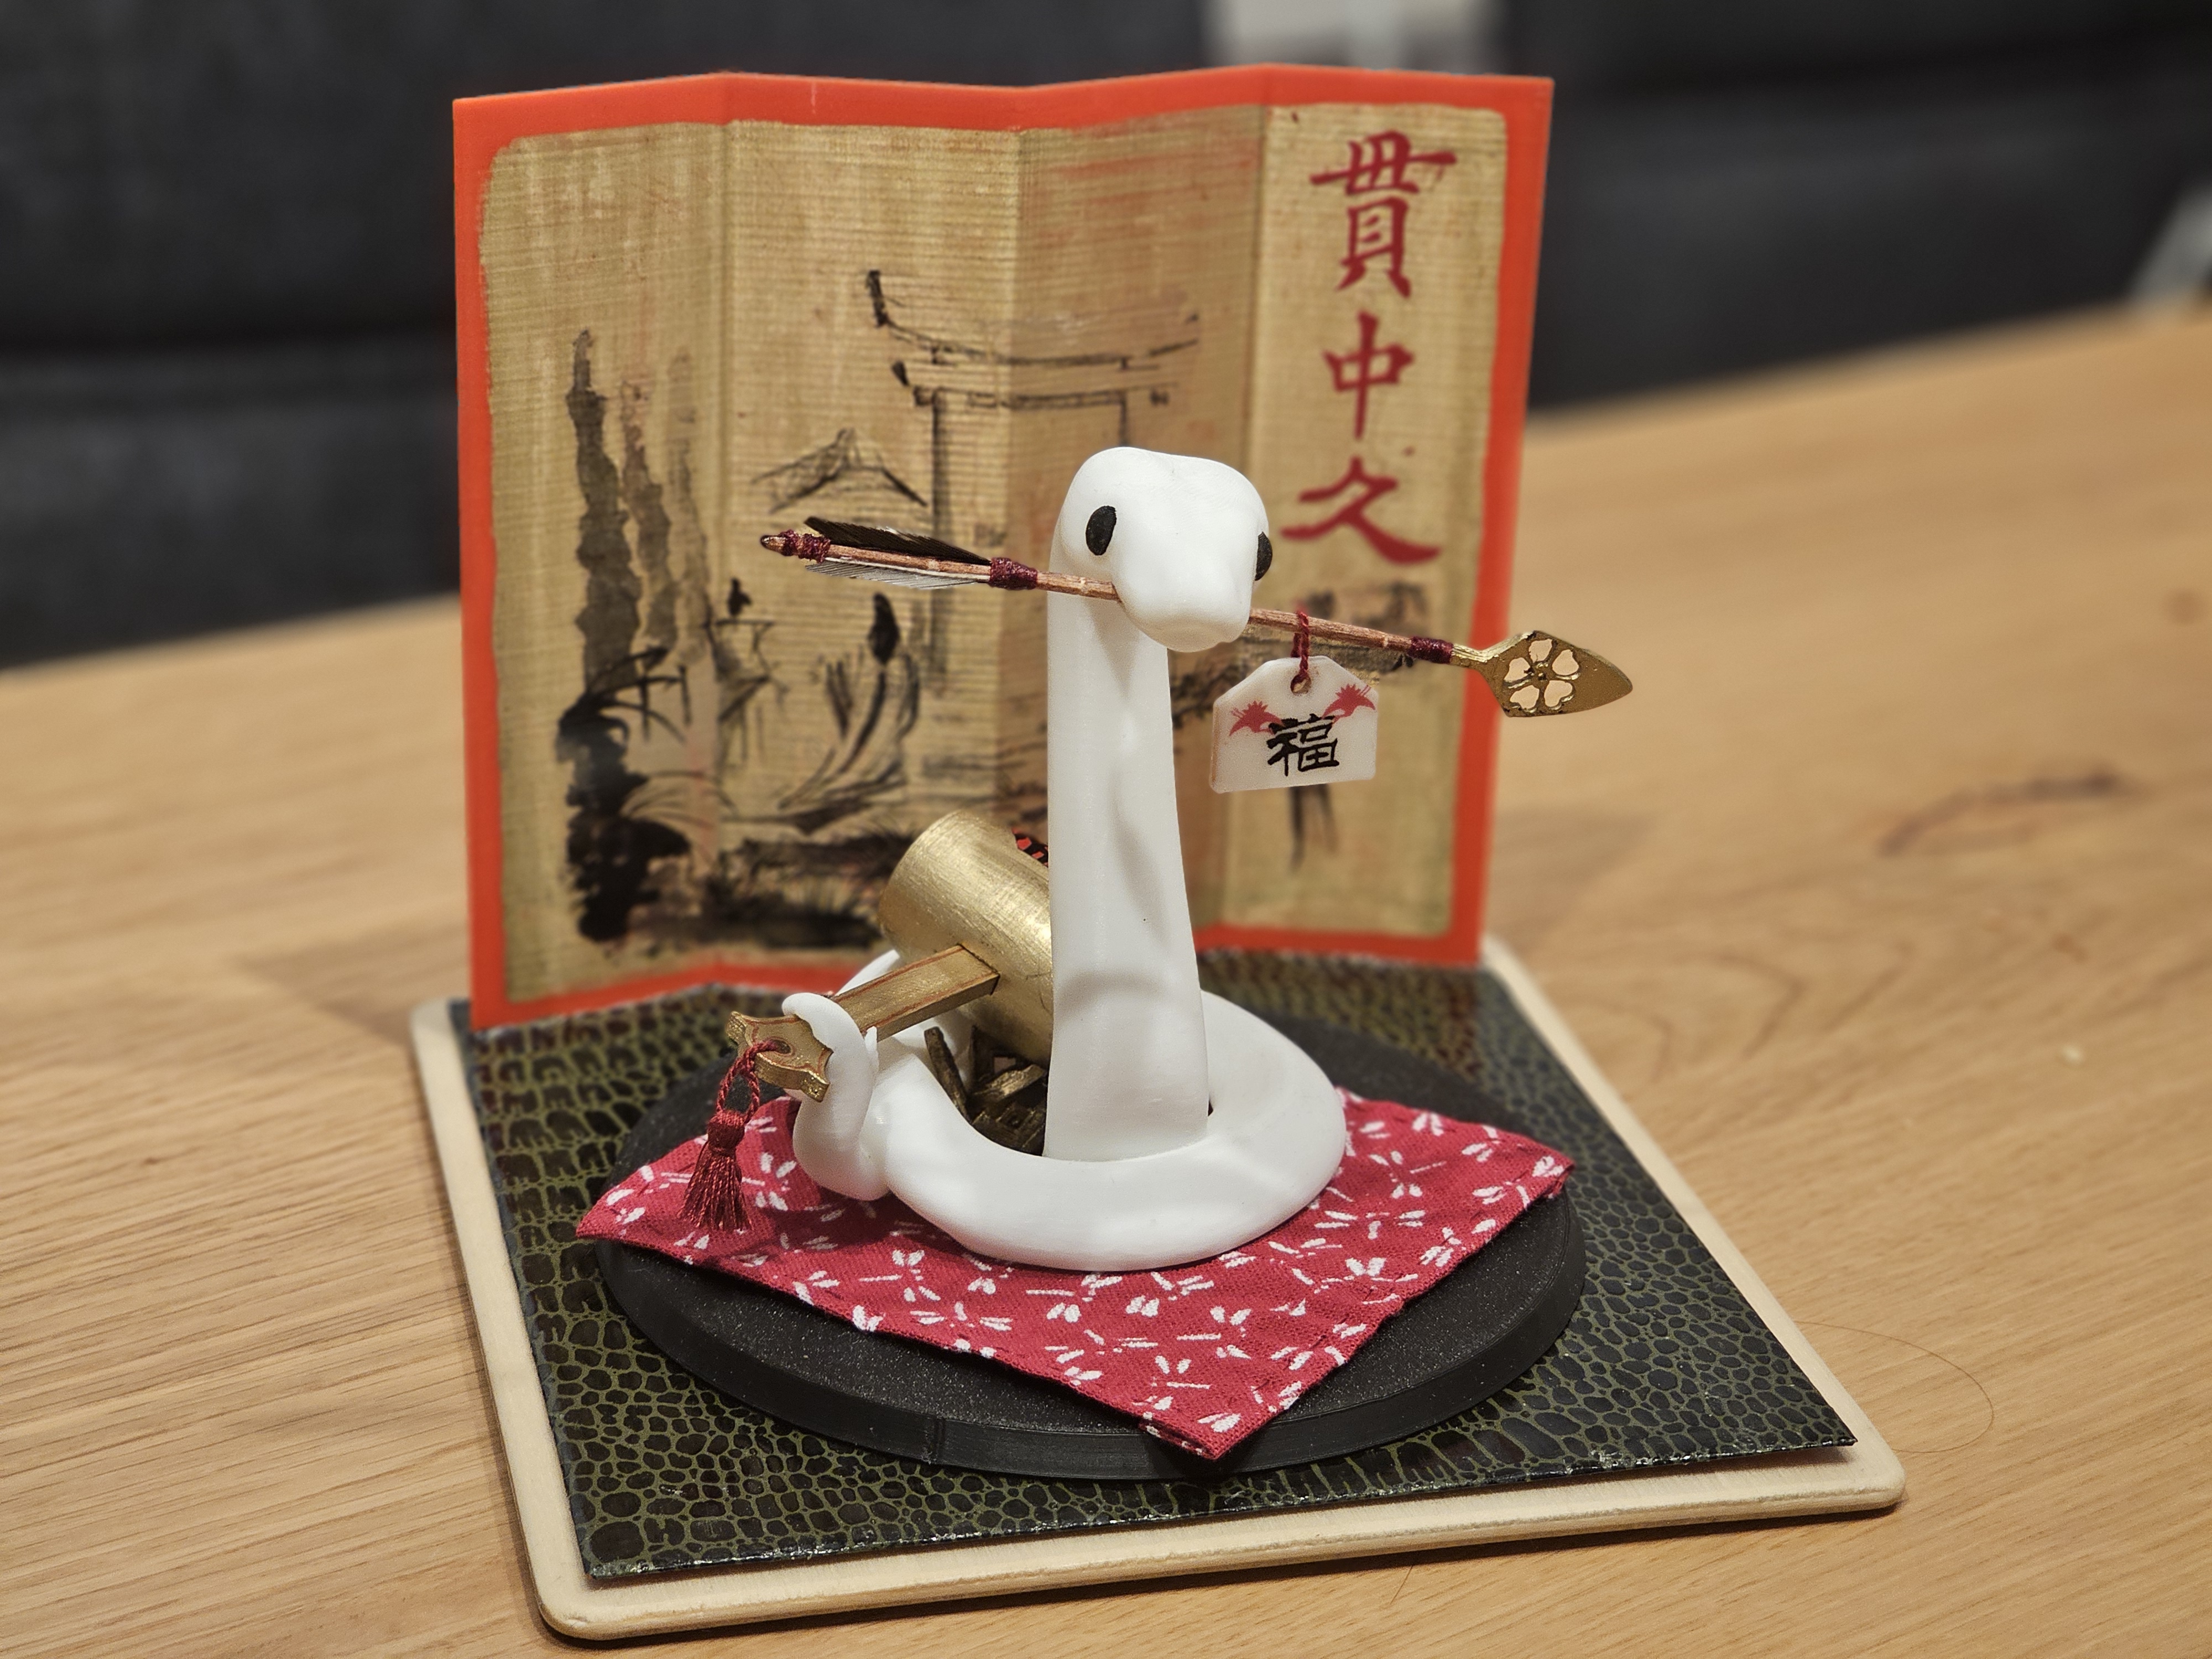
It was late in the year that I learned that my Kyudo Club had an annual special New Years Event, with games and fun and good food. I decided I wanted to contribute something and after thinking for while, I began crafting a figure of a snake with good luck symbols to donate as a prize to win and I wanted to make it with my 3D printer.
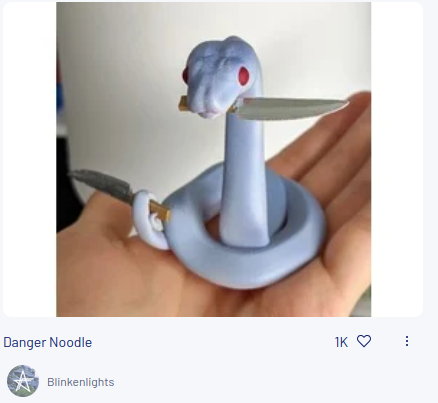
When you work in digital models, it is very easy to mix and match and to add to existing models. In a modelling context that is commonly called kit-bashing and that is the path I wanted to take. So I looked for an existing model of a snake to build upon and found one I liked based in a meme on thingiverse. I liked it because it was semi realistic, but also not overly threatening.
Afterwards, I researched for good luck symbols from Japanese mythology that I wanted to add and I landed on three:
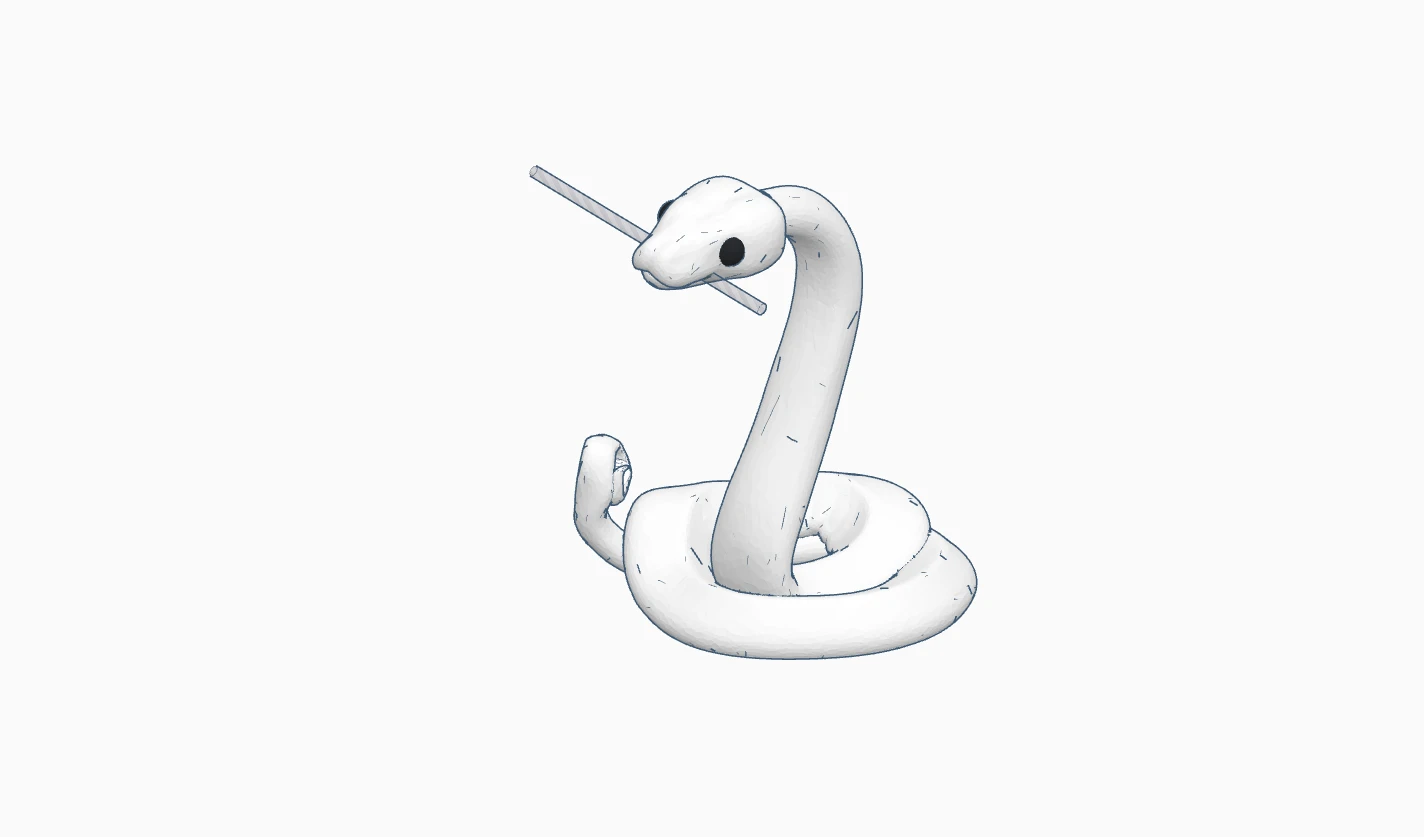
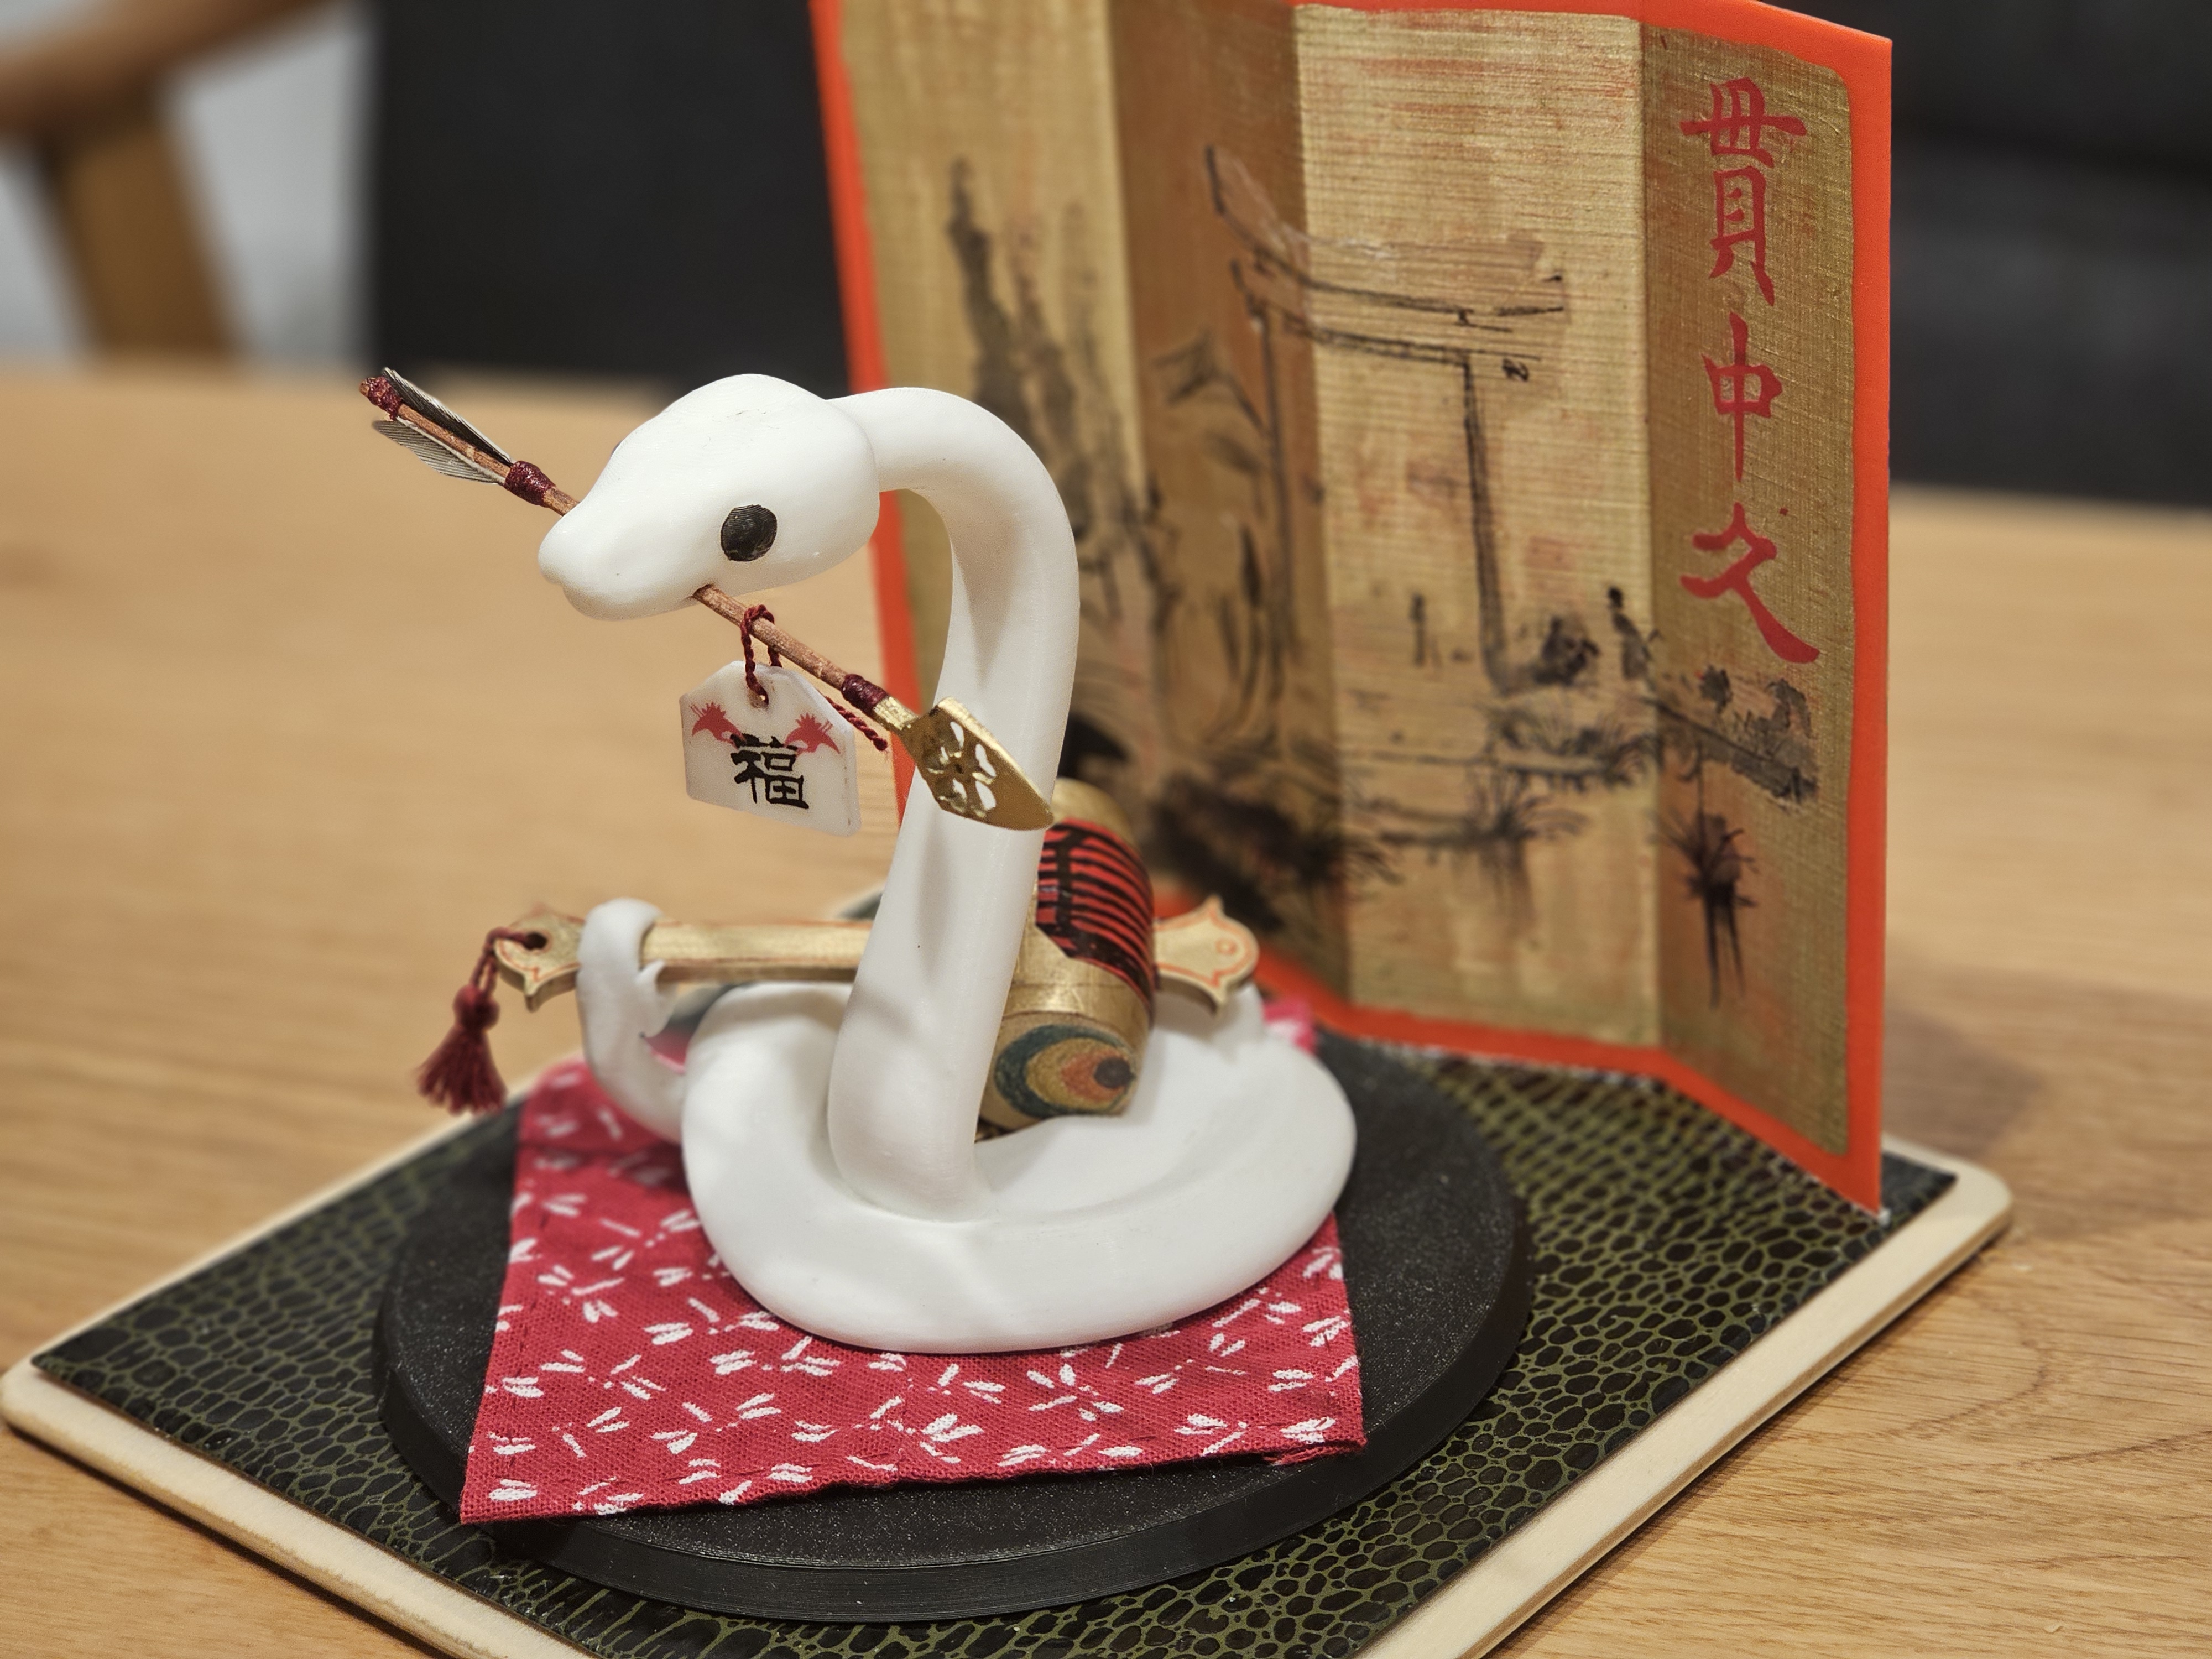
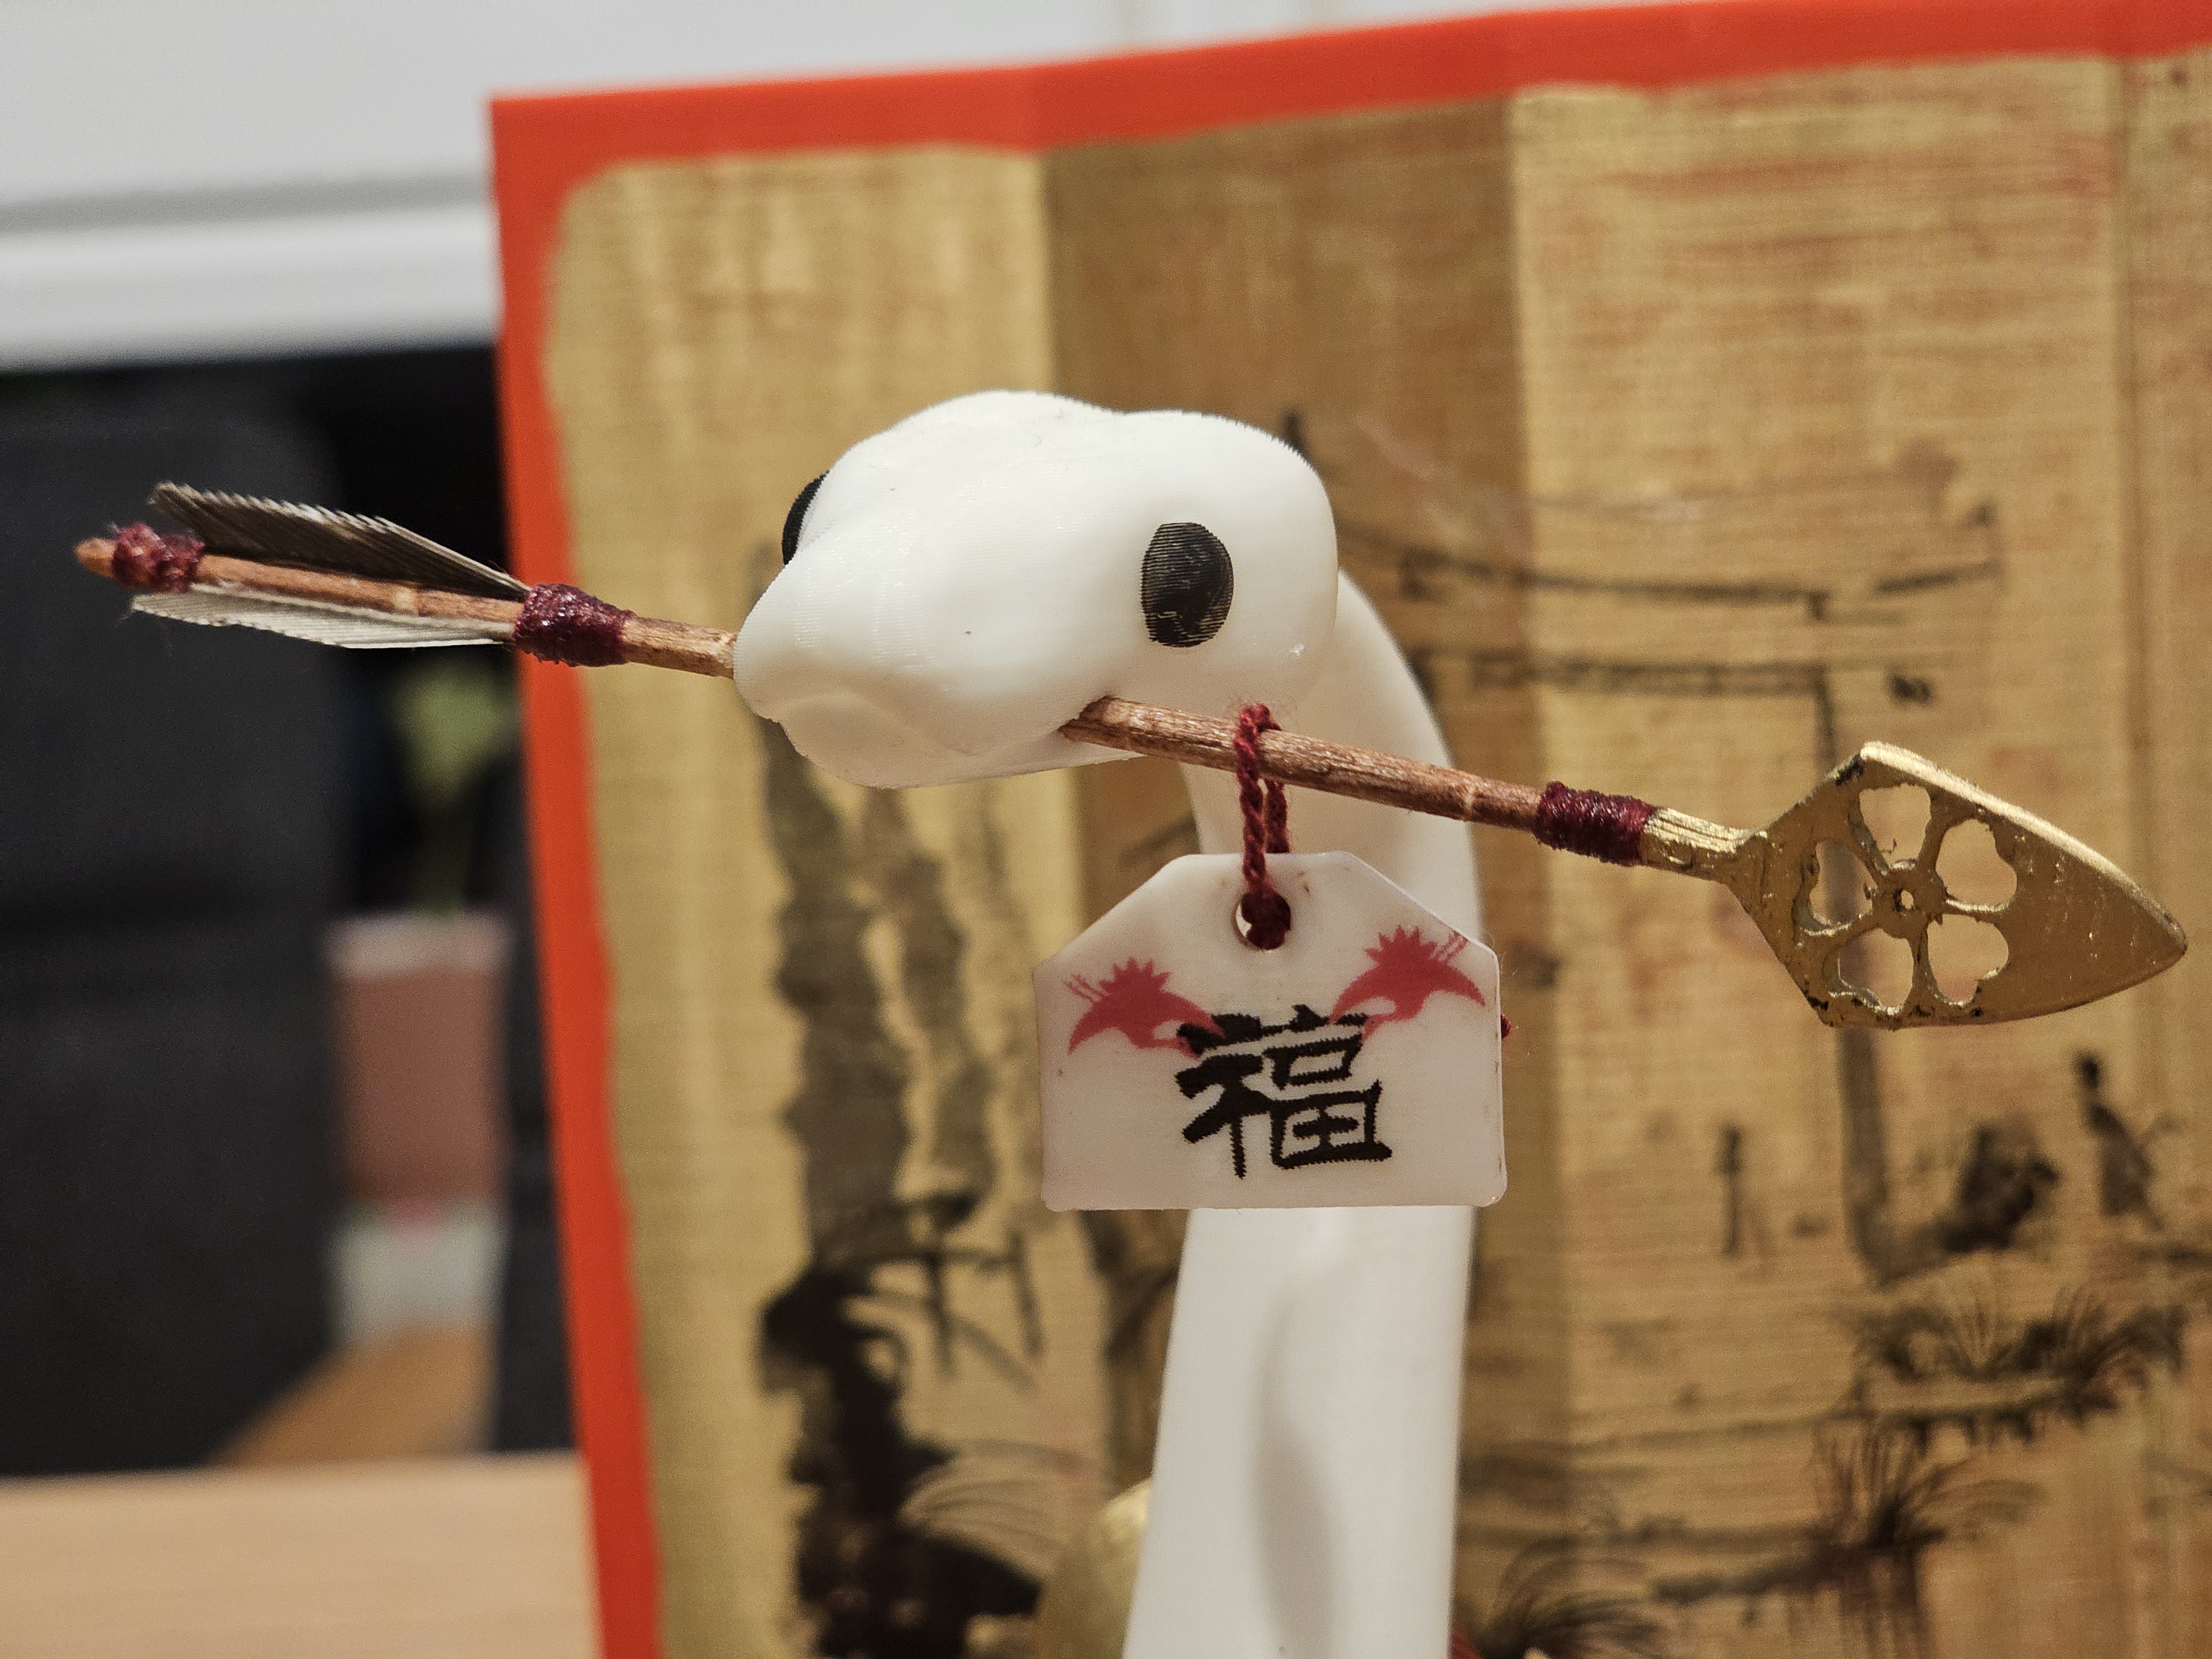
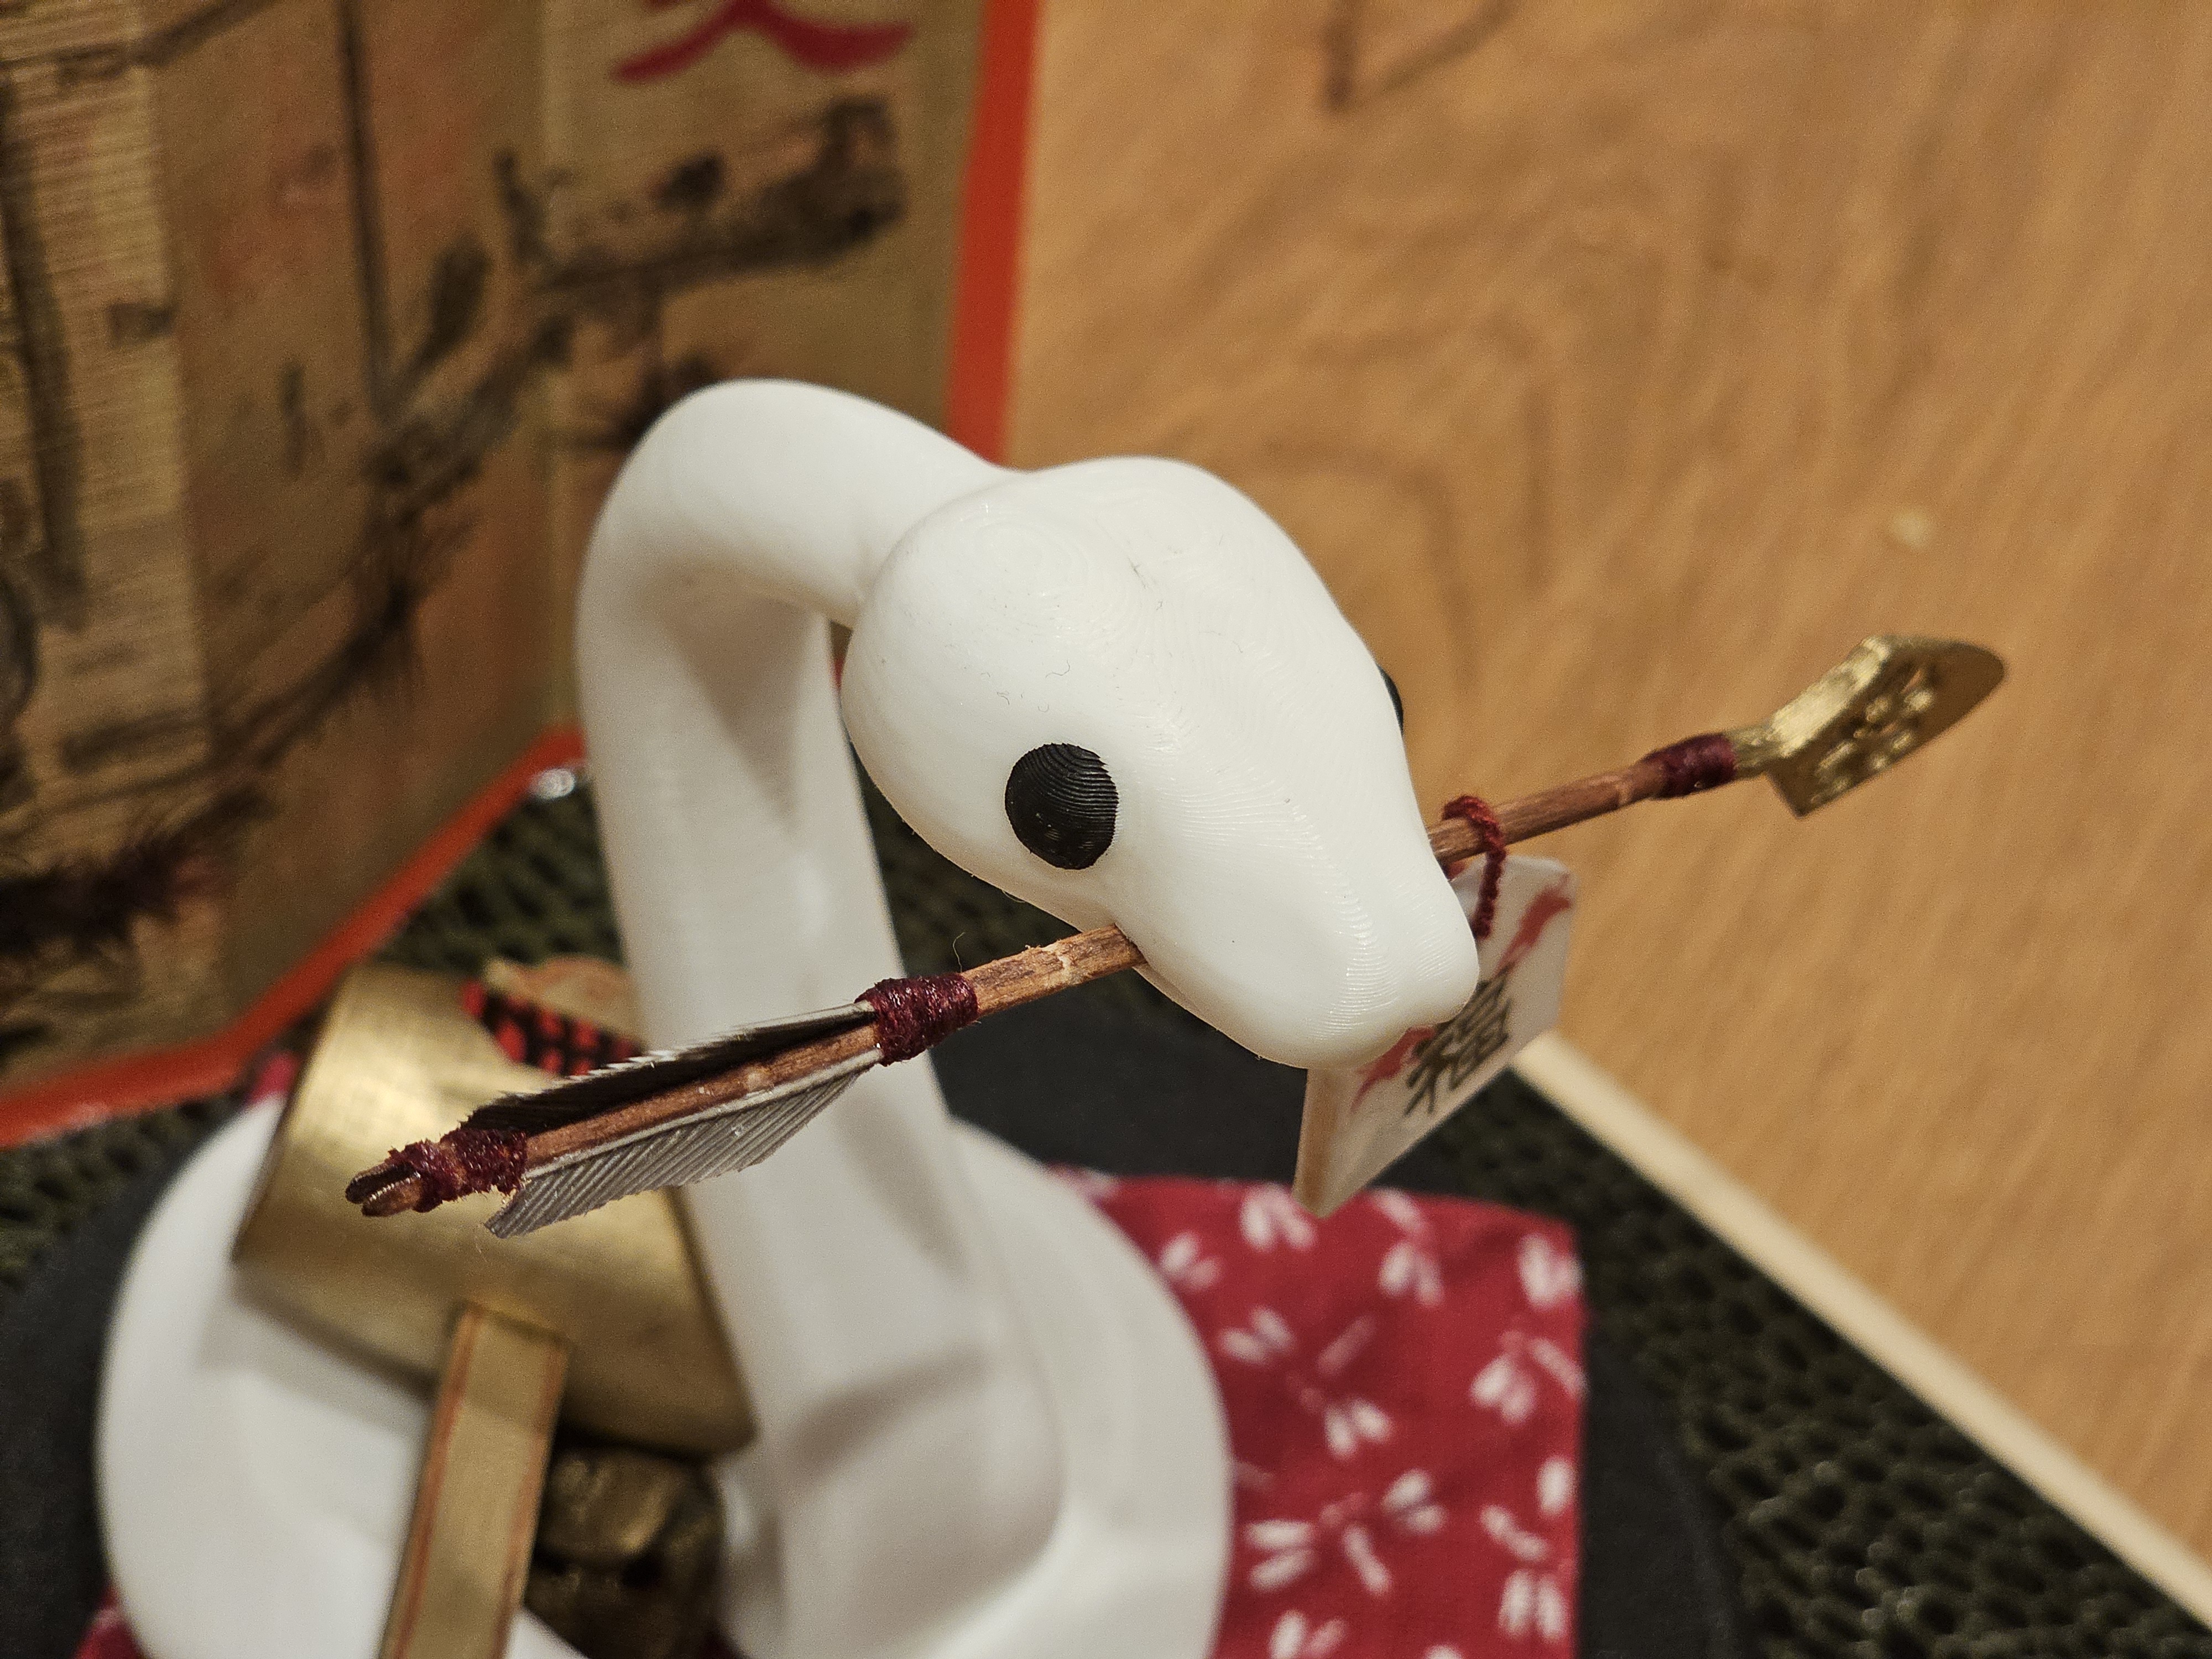
- Have the snake hold an arrow in its mouth
- Have the snake be coiled around golden coins
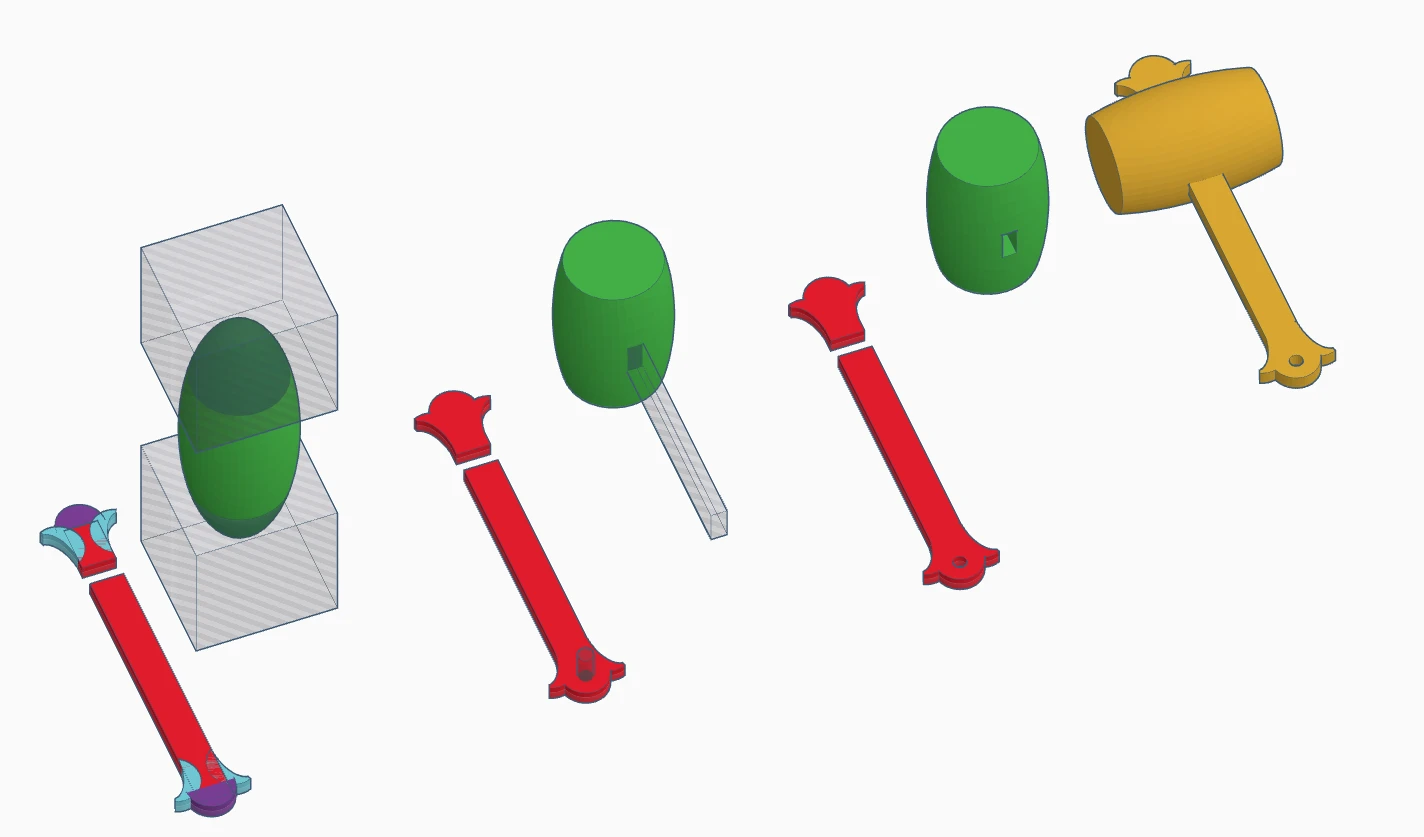
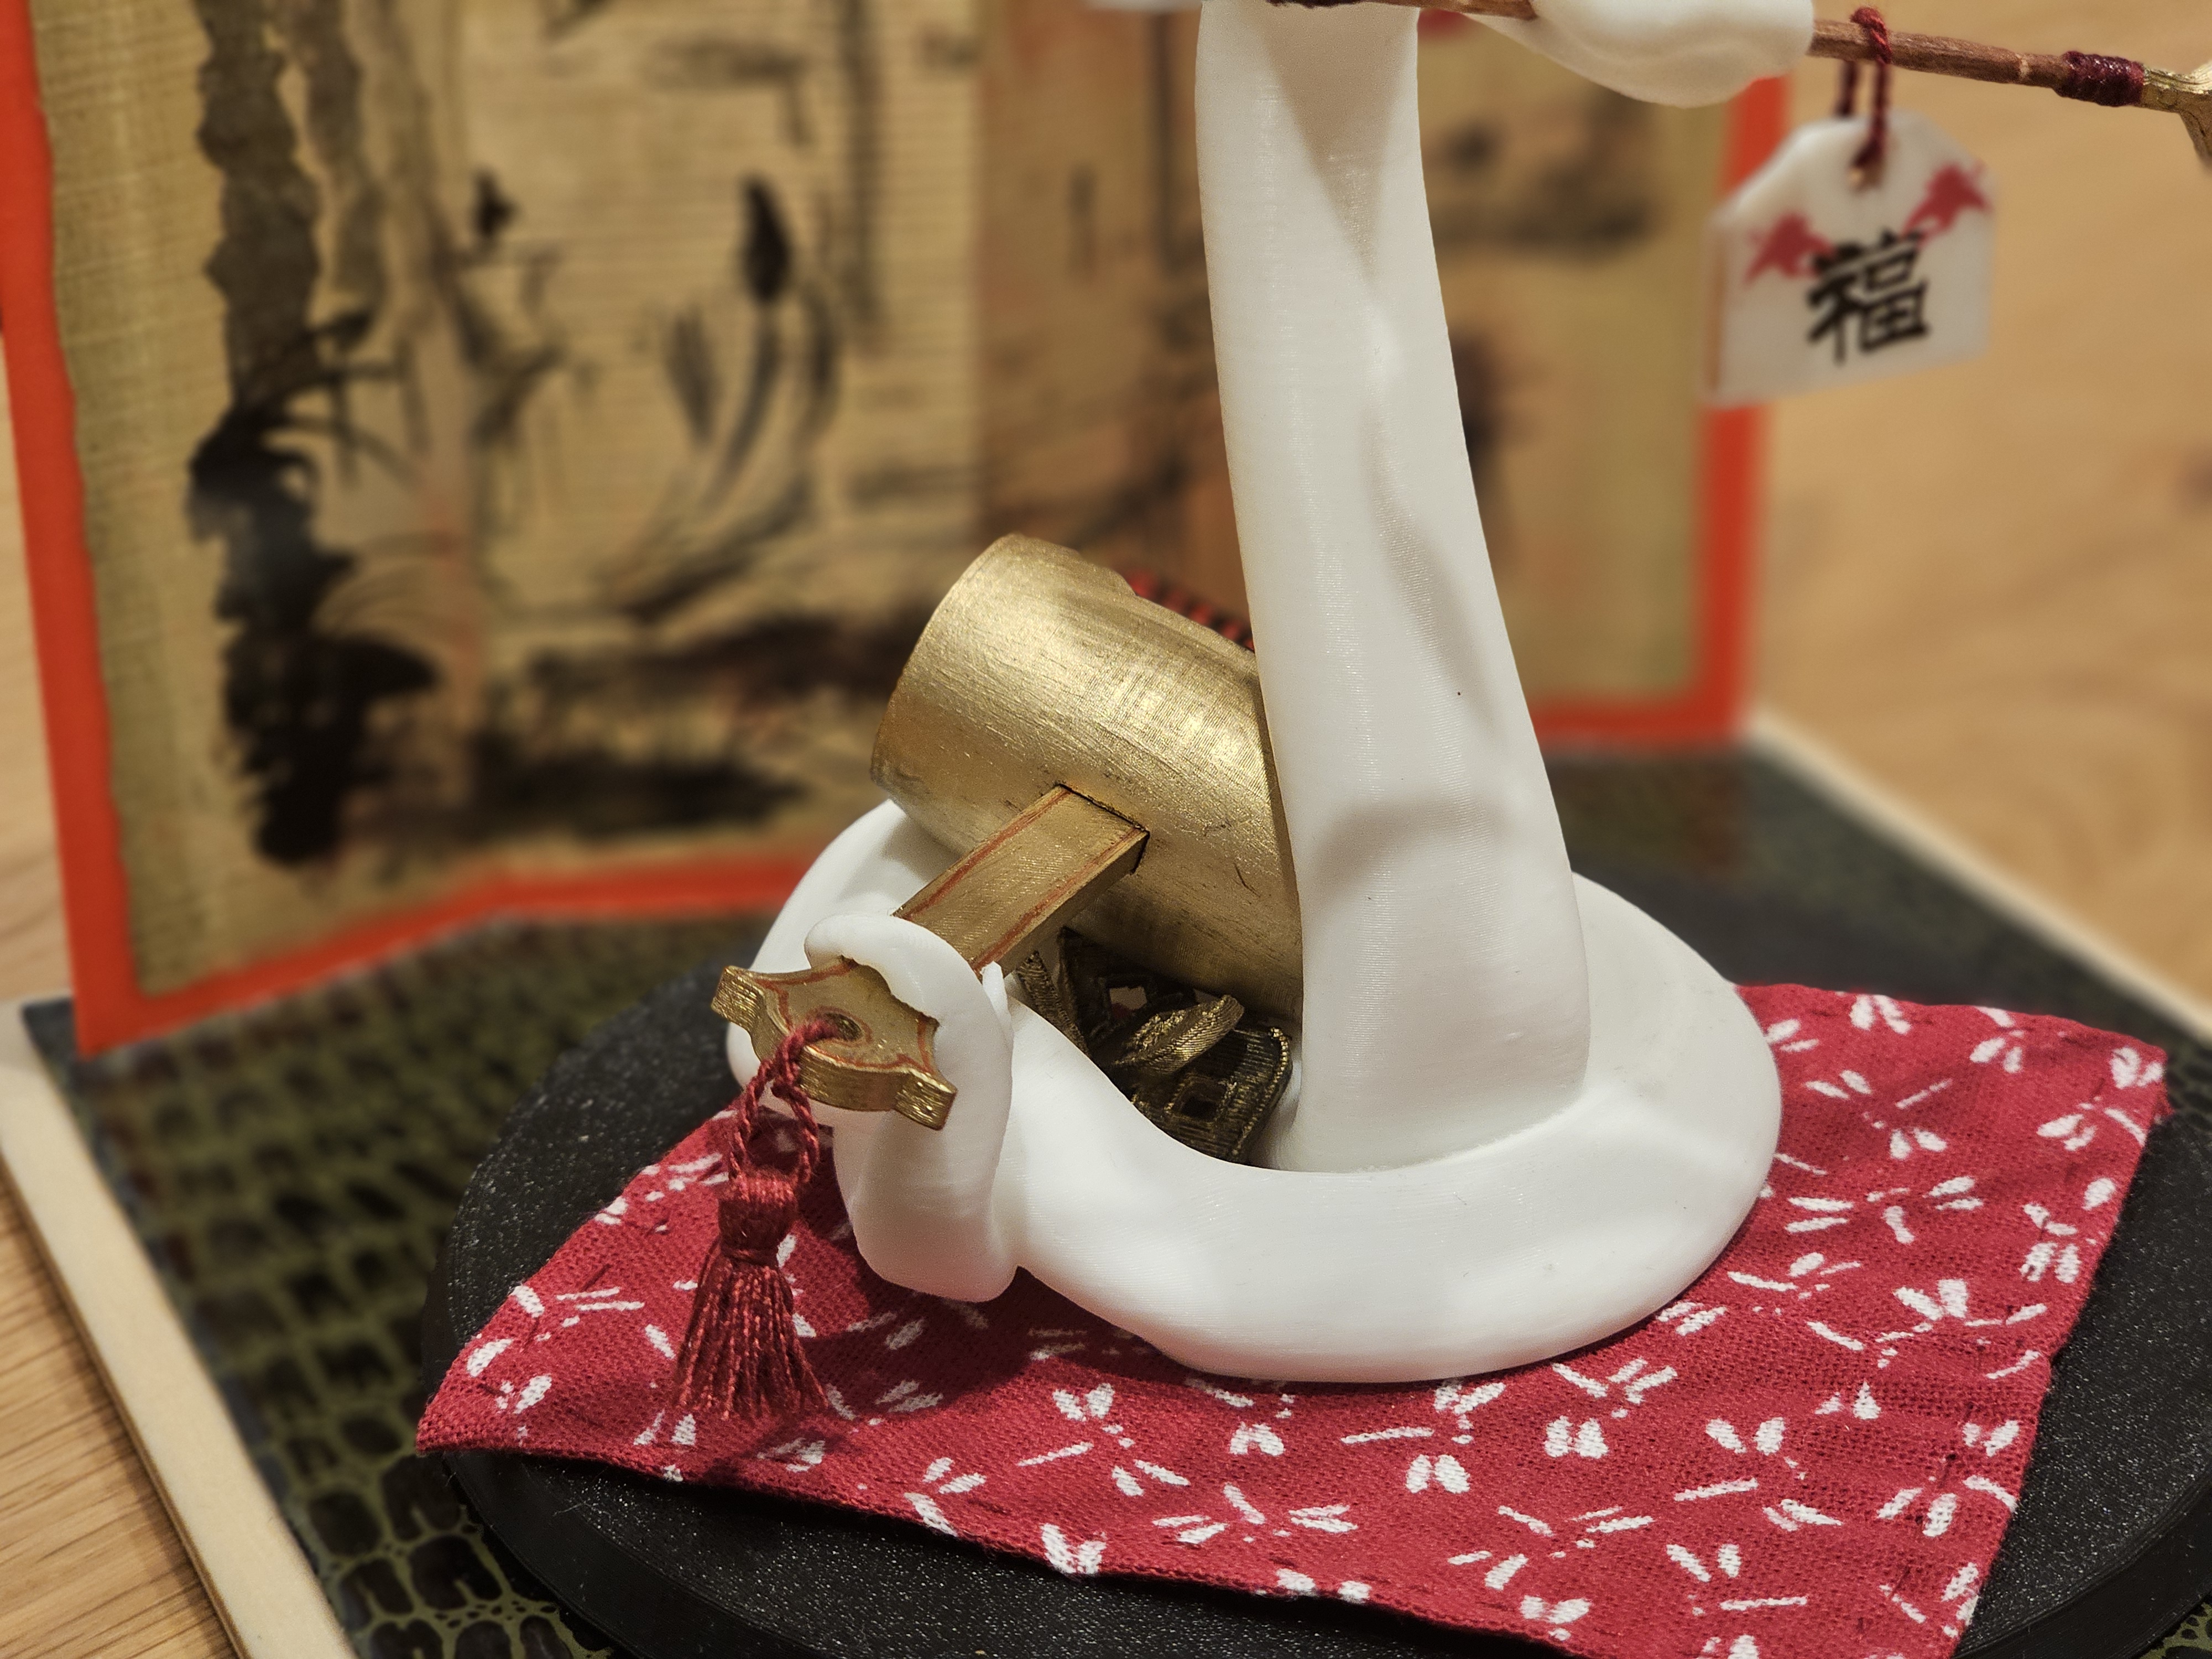
- Have it hold a good luck mallet1 in its tail
This required some changes to the original model. The mouth had a hole to hold on to a knife in the original piece. I had to rebuild the geometry there from scratch. I also had to change the snake tail to fit with the expected shape and angle of the mallet which obviously differed from the original knife.
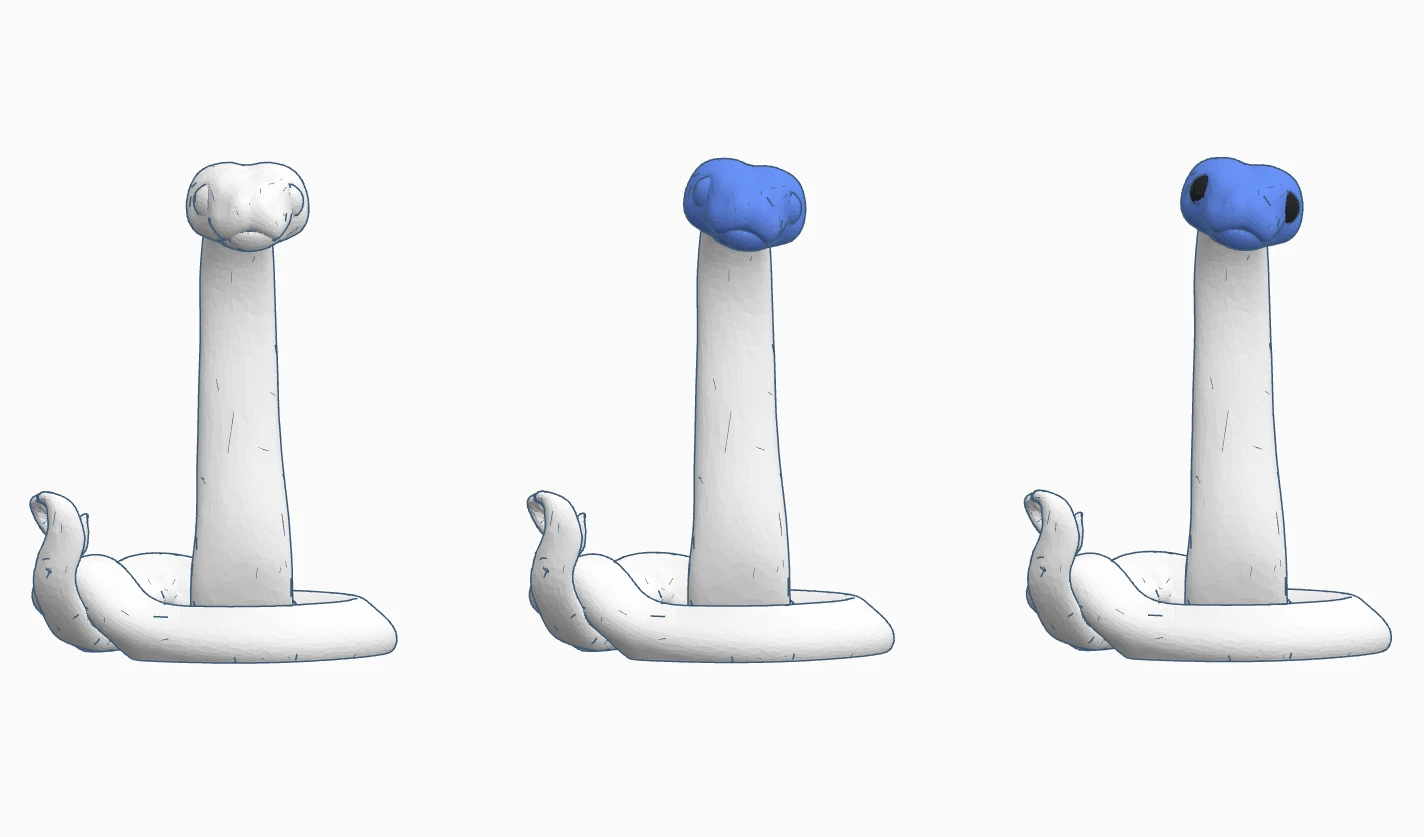
In terms of cuteness, “Danger Noodle” was a great start but to make it even cuter, I first cut the head off and slightly rotated it to give it that typical puppy head tilt and then I made the eyes slightly bigger by adding spheres.
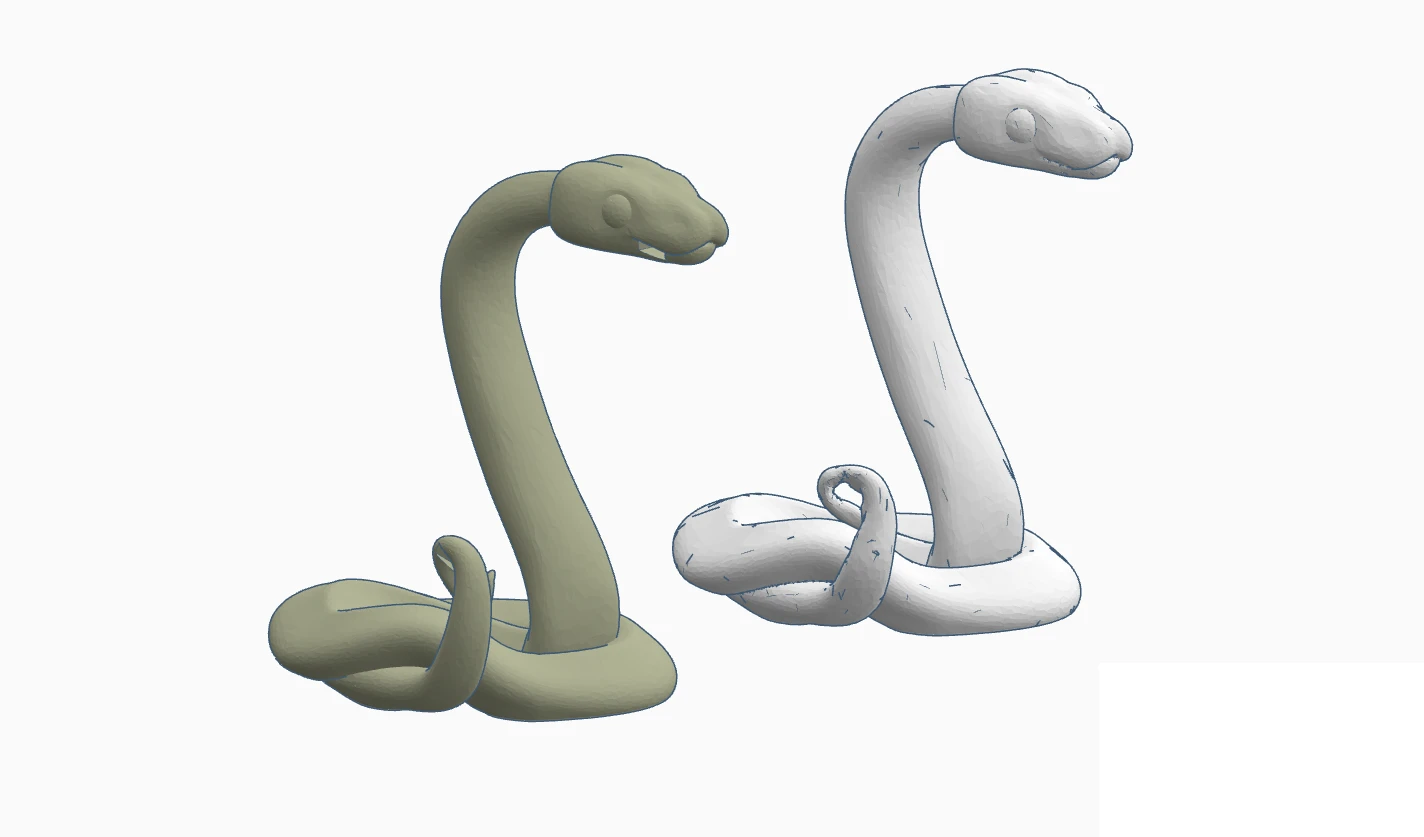
"Danger Noodle" and my rebuilt and altered geometry (white)
Adding a puppydog head tilt and bigger eyes
Adding a throughhole for the arrow
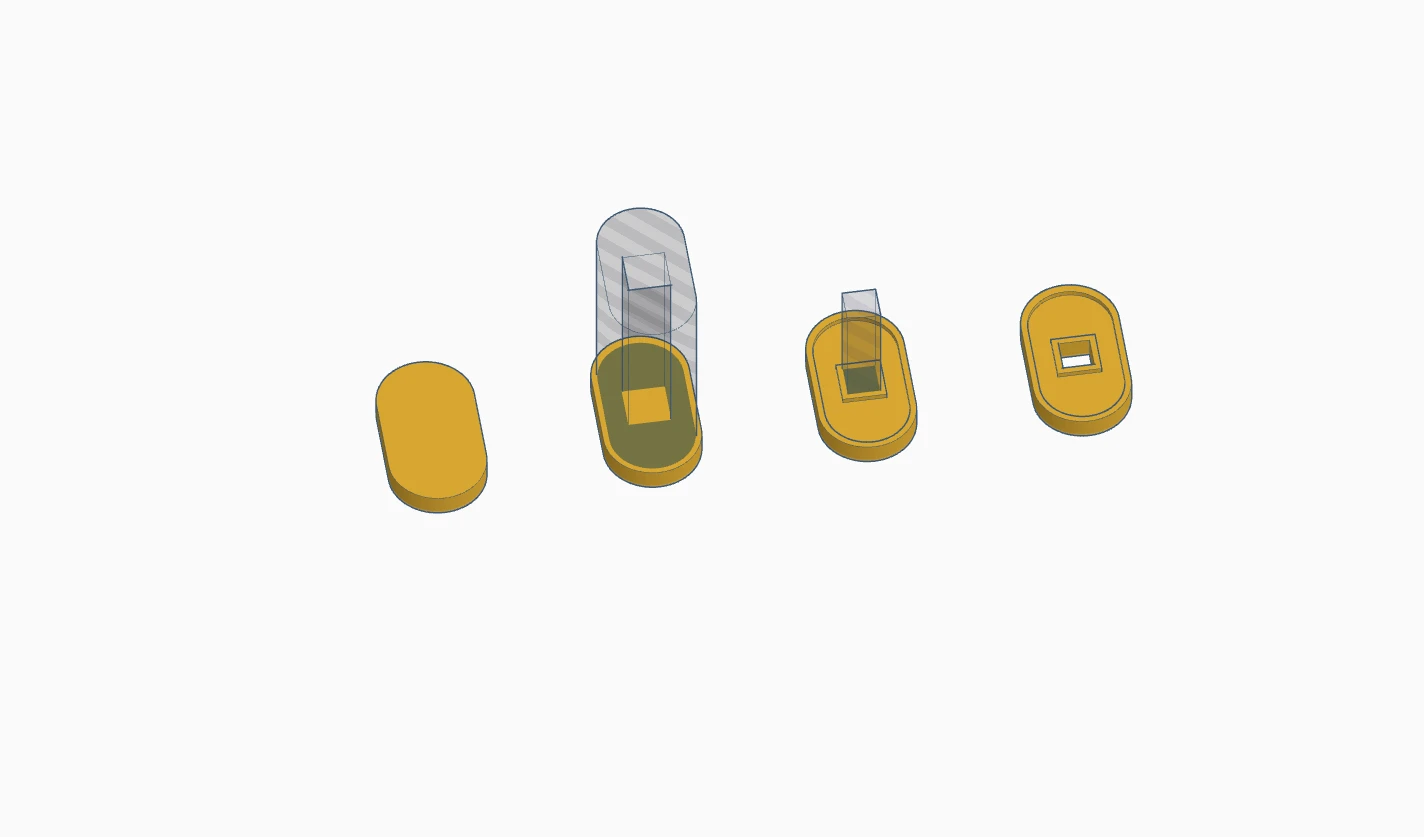
The handle of the mallet I built was flared out with a decorative element. Since the snakes tail “hand” was modelled as a closed loop it wouldn’t be able to have it in place, if it was one piece. I realised that I would have to construct the mallet as multiple pieces that fit together. This way I would be able to slide the thin top end of the handle through the “hand” before attaching it to he mallet.
Constructing the Good Luck Mallet
Subtracting the mallet from the snake Body to make space for it
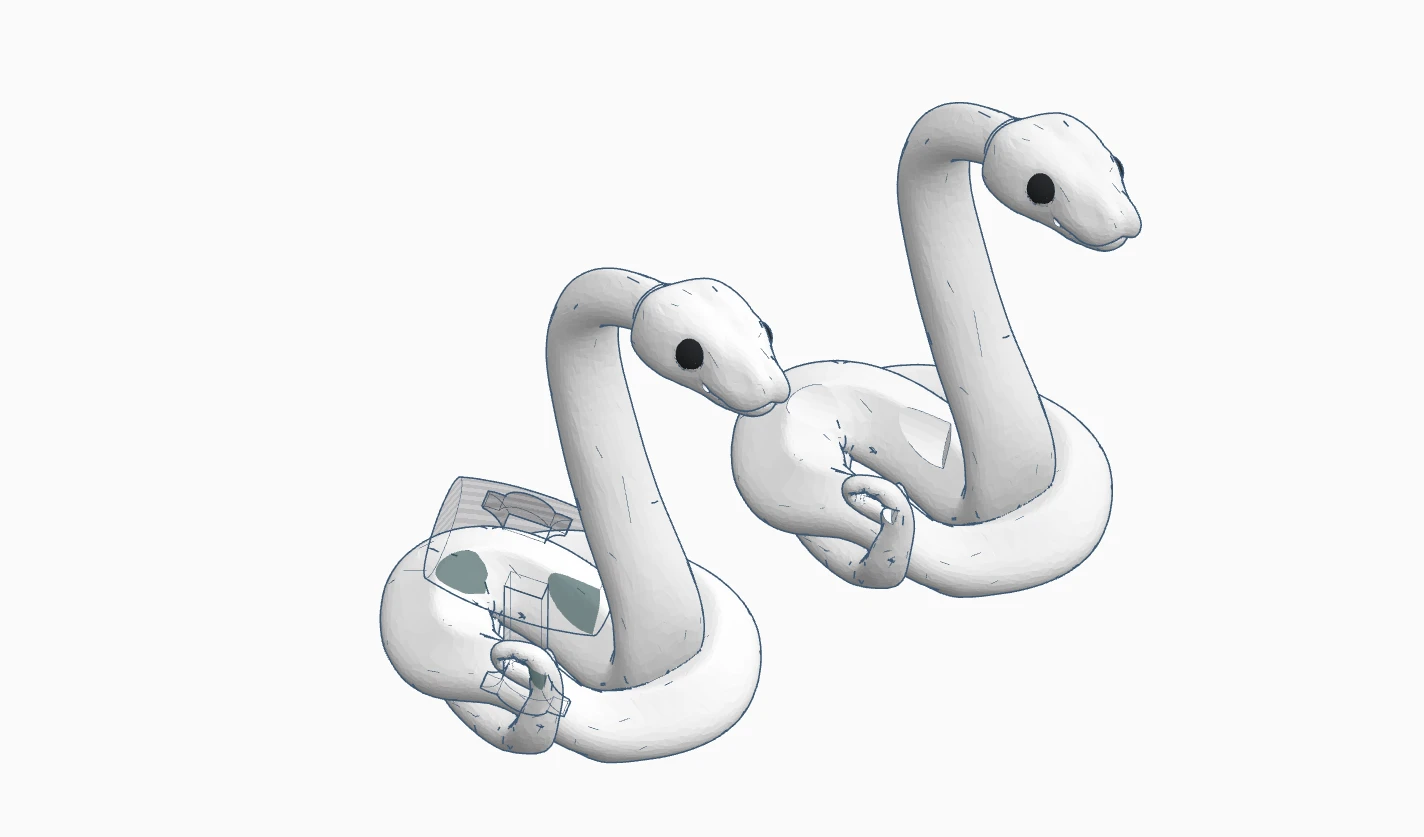
The old Japanese oval coins2 were easy to make. I just had to be mindful of the thickness and the details, to make sure they were not too small to print. Then I played around with them and scattered them in the snake coils. I wanted to print them as a separate piece so I would have an easier time painting them without worry to accidentaly get paint on the snake.
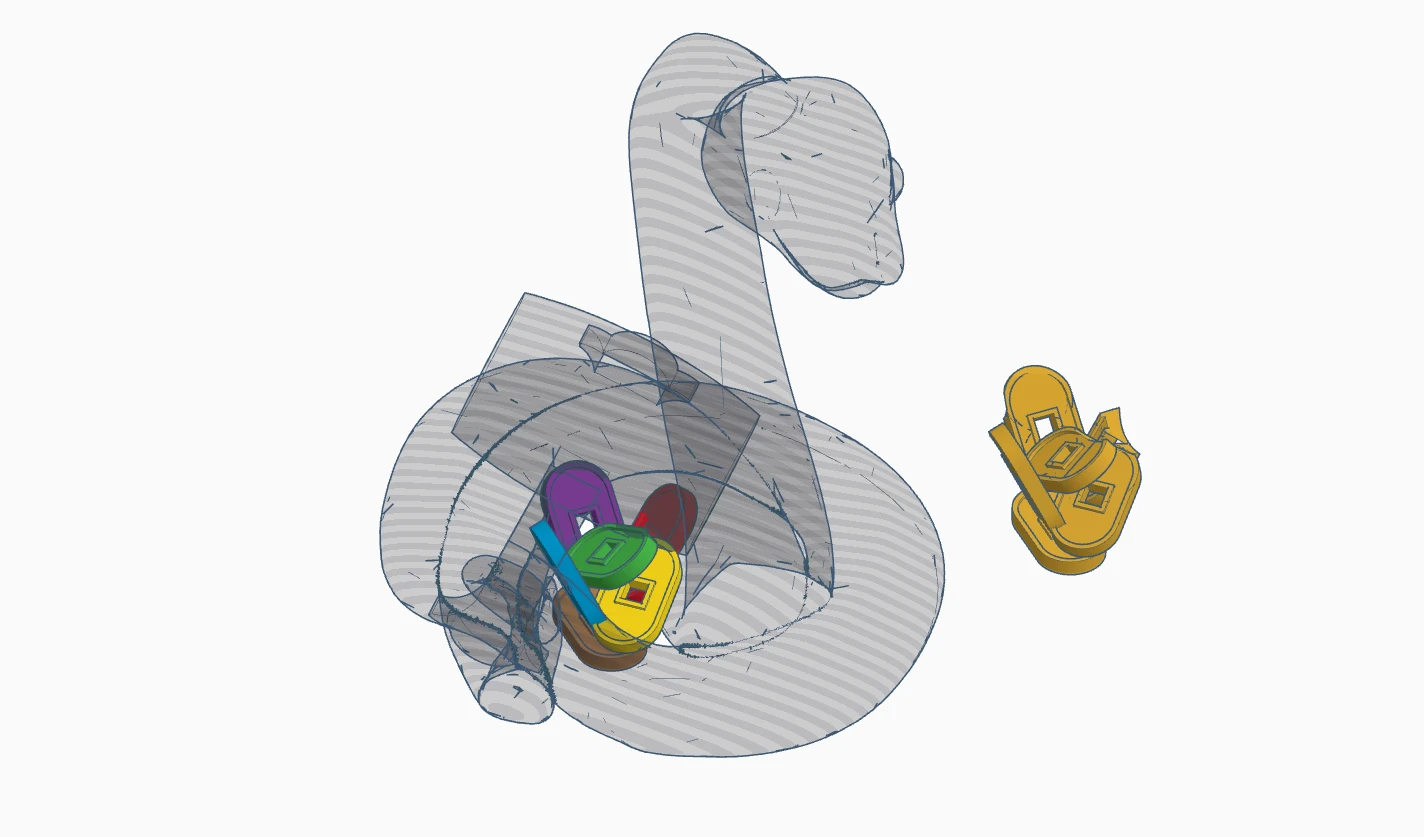
Constructing a coin
Bunching up the coins and subtracting the snake and the mallet
The arrow I wanted to craft from wood instead of 3D printing it. One reason for that is that I wanted to mix media instead of making a purely plastic trinket. But also because a long, thin feature like a miniature arrow shaft is notoriously annoying to 3D print. You would either have to print it in two pieces lengthwise or it would sag and deform. So instead I designed it around a toothpick. But the arrow tip I wanted to be a specific ornate type3. I designed it from scratch and gave it a socket that a toothpick would fit into to make gluing easier.

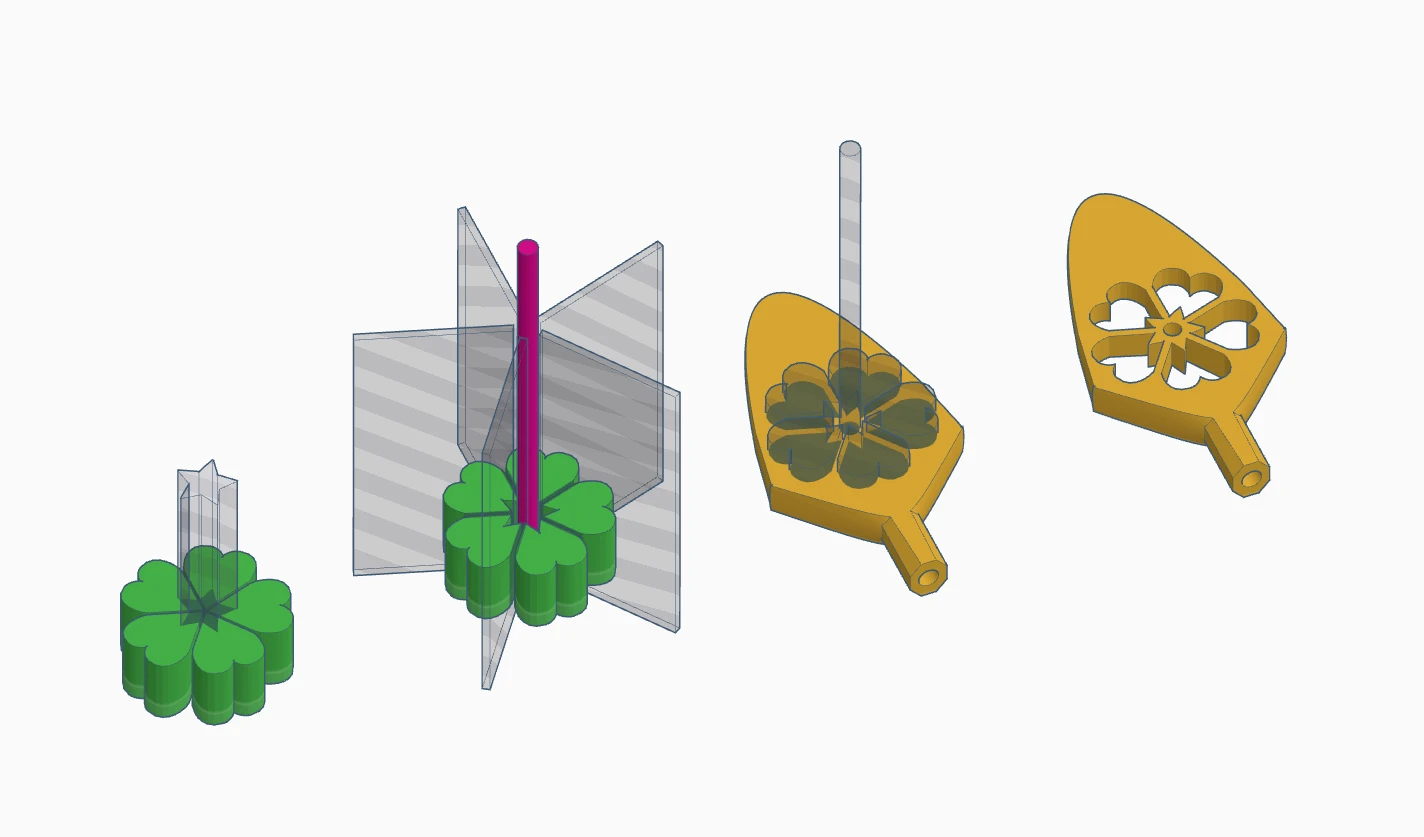
Constructing the base of the arrow head
Constructing the flower shaped cut out
Looking it over, I had some idea for revisions. Give the snake a platform to sit on and attach a little ema tablet to the arrow. Both were very easy to model.
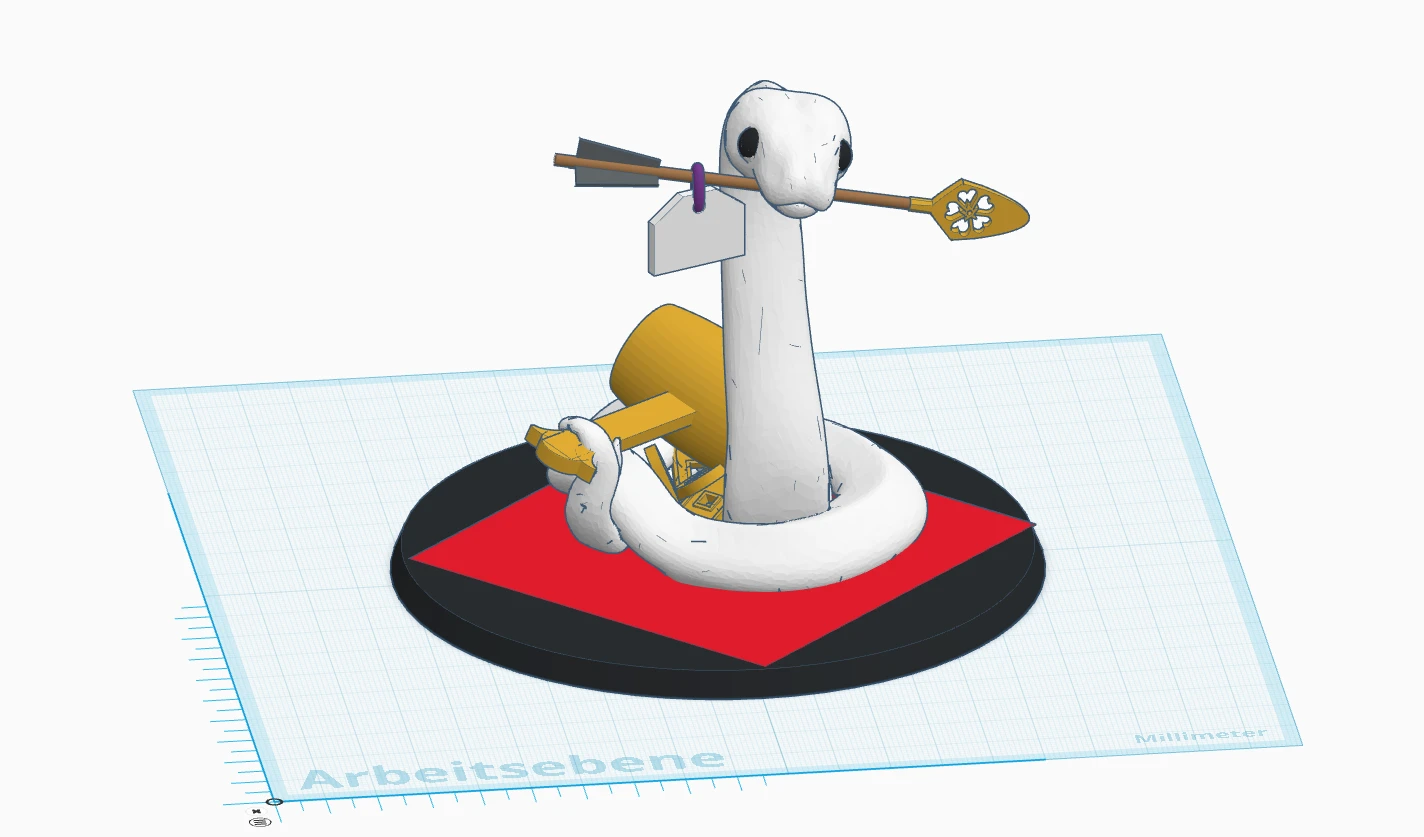
Virtual dry fit
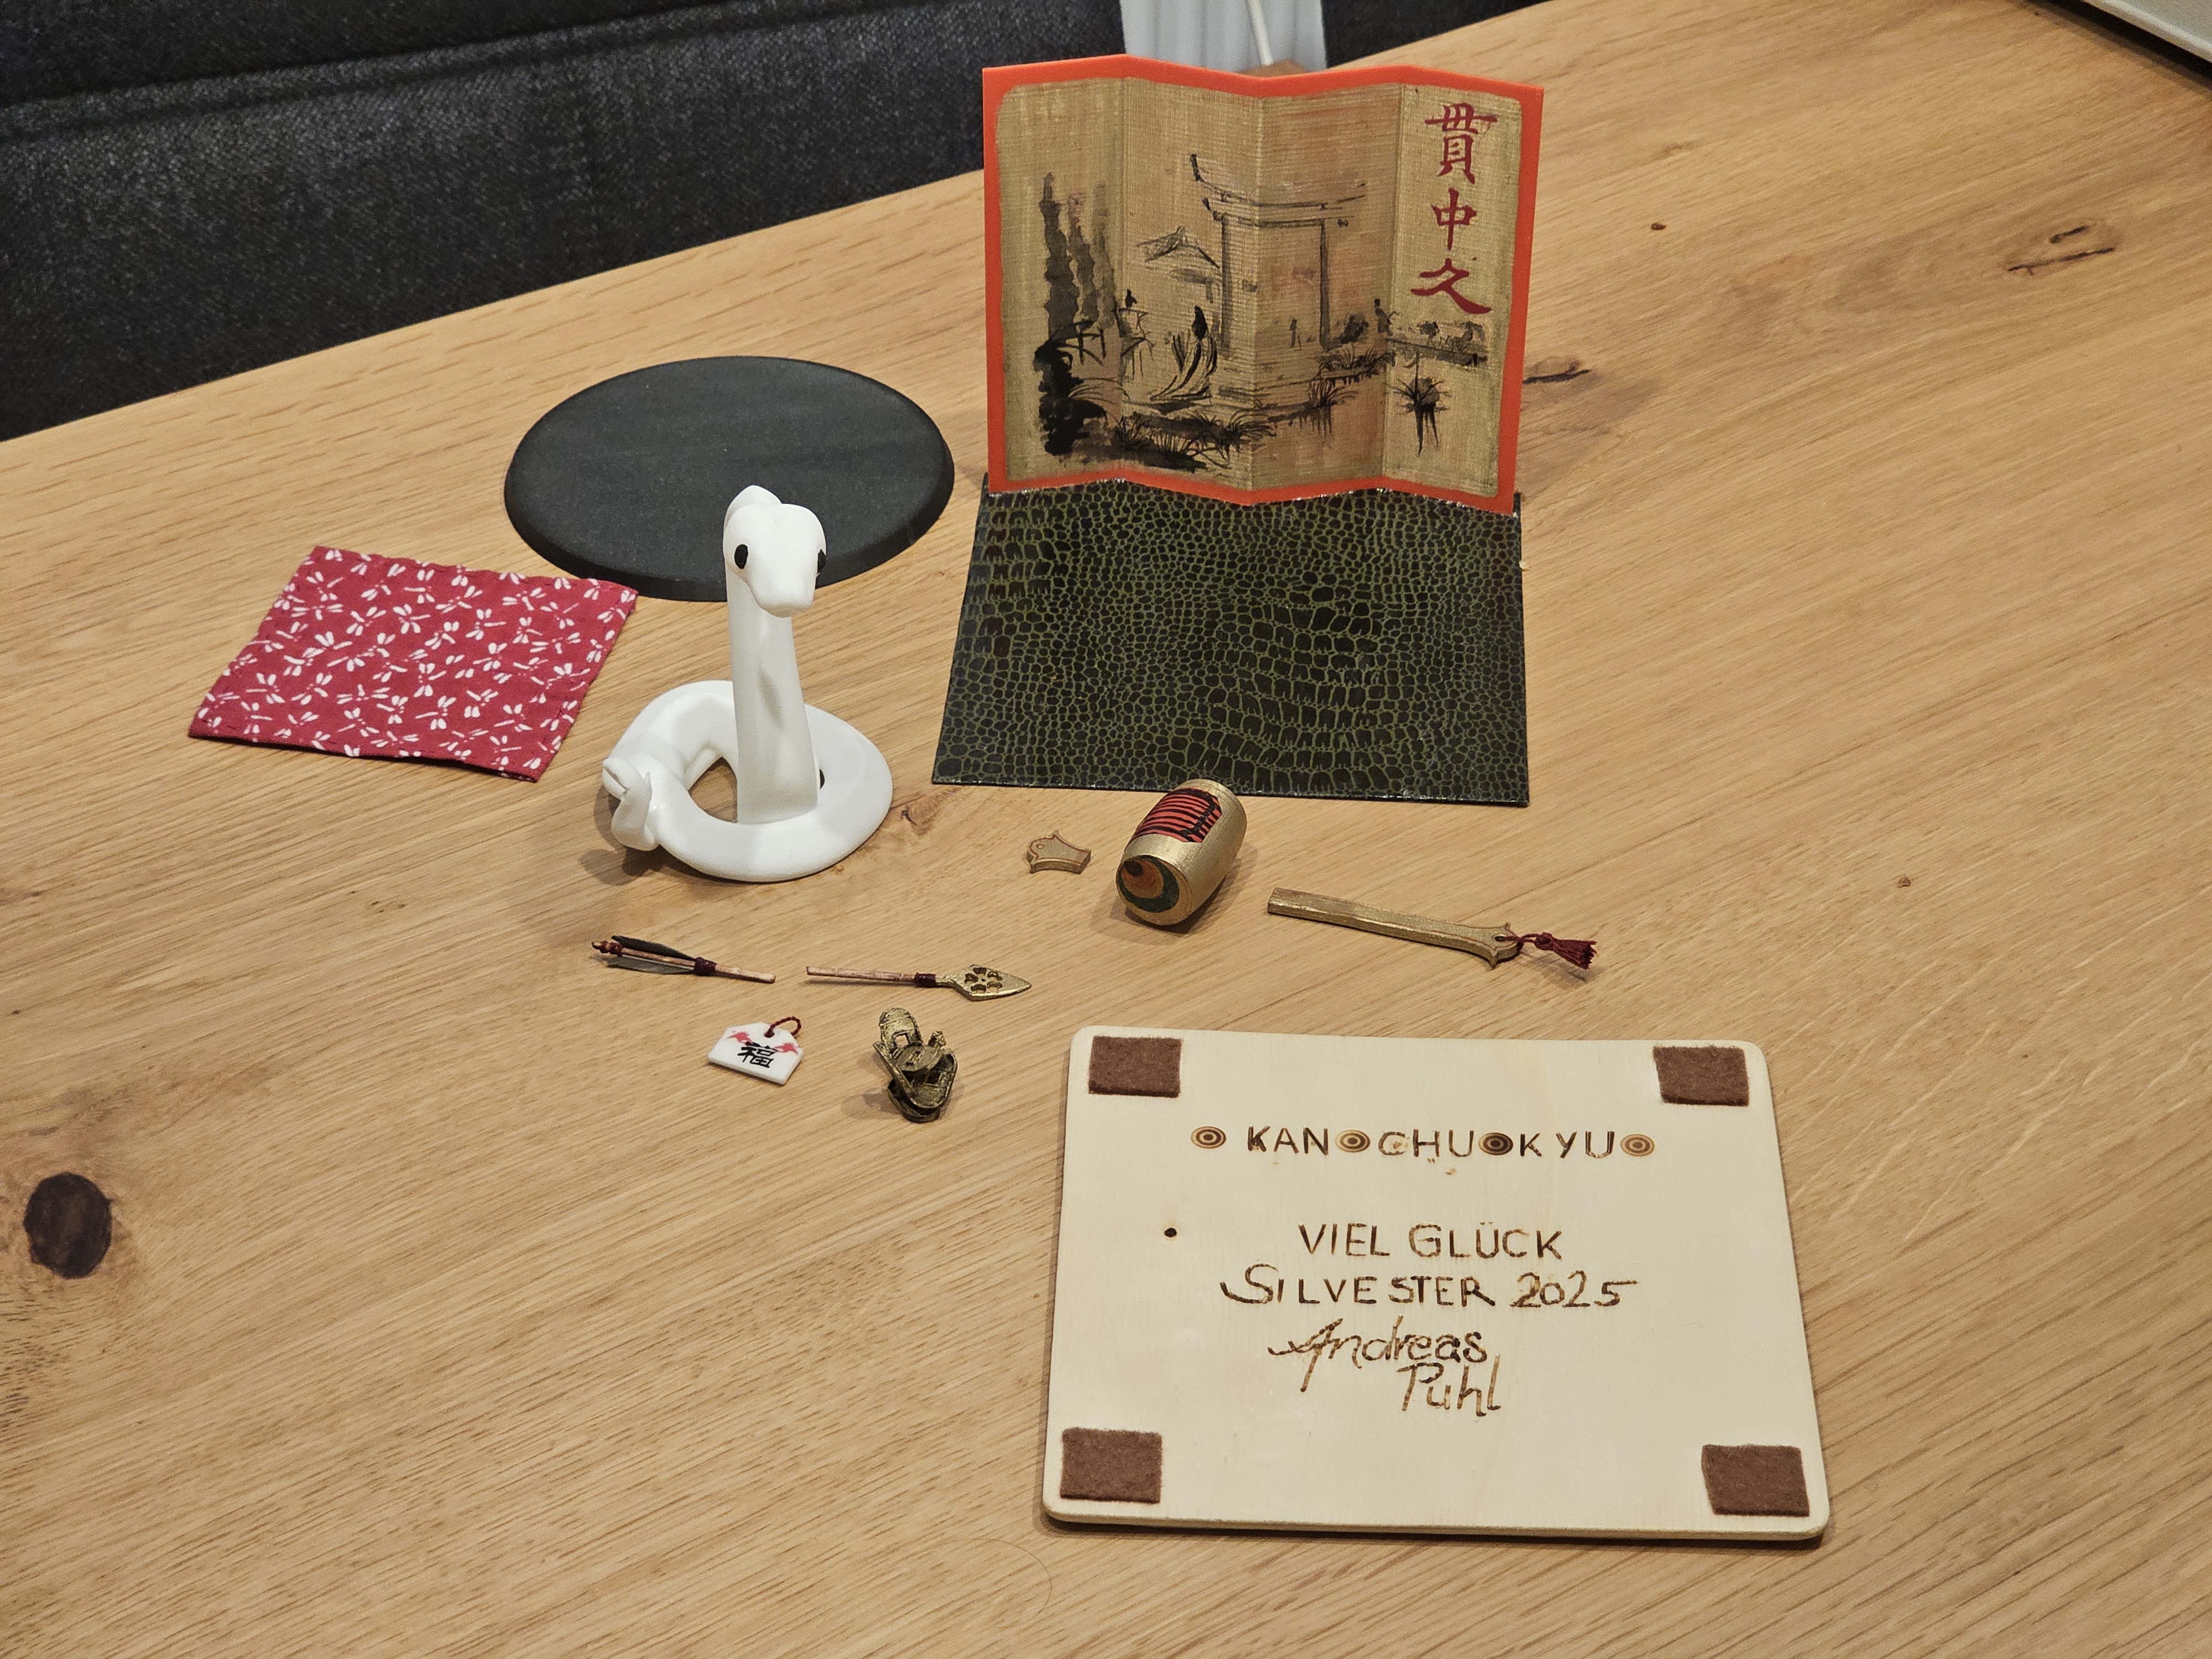
With that, all parts were ready to print and then assemble. The results were promising so I continued with sanding and painting everything. The snake was made with white plastic because I thought I could skip painting - But the result wasn’t convincing, so I ended up painting the white snake with white color and black eyes. The golden parts were painted with a gold rub and buff paint. I stained the toothpick arrow with dark brown ink and then used a fine saw to make shallow cuts to simulate bamboo nodes. Then I used the same saw to cut a nock slit, glued some tiny pieces of real turkey feather to it and added some red thread as winding. I cut the shaft in half so I could shove each half through the snakes mouth for both sides. I grabbed some leftover tenugui fabric to sew a little fabric cushion for the snake to sit on - everthing was coming together.
I felt like all the snake now needed was a folding screen behind it. So I modelled one. However when it comes to printing things, they ideally need flat surfaces lying flat on the print bed. The zig-zag of the folding screen made that difficult. So I decided I would print it upright, which necessitated a flat base surface to make sure the folding screen wouldn’t just fall over.
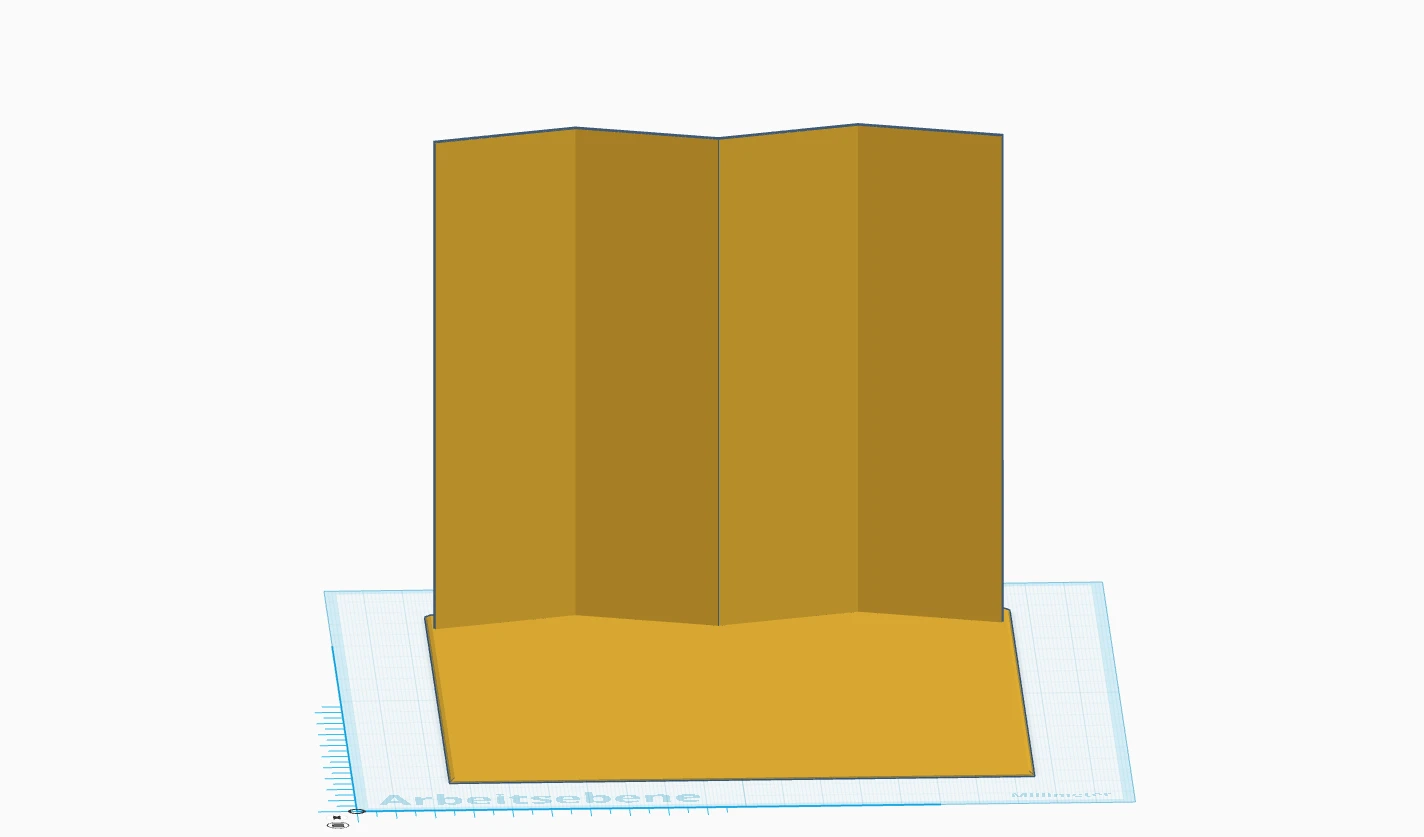
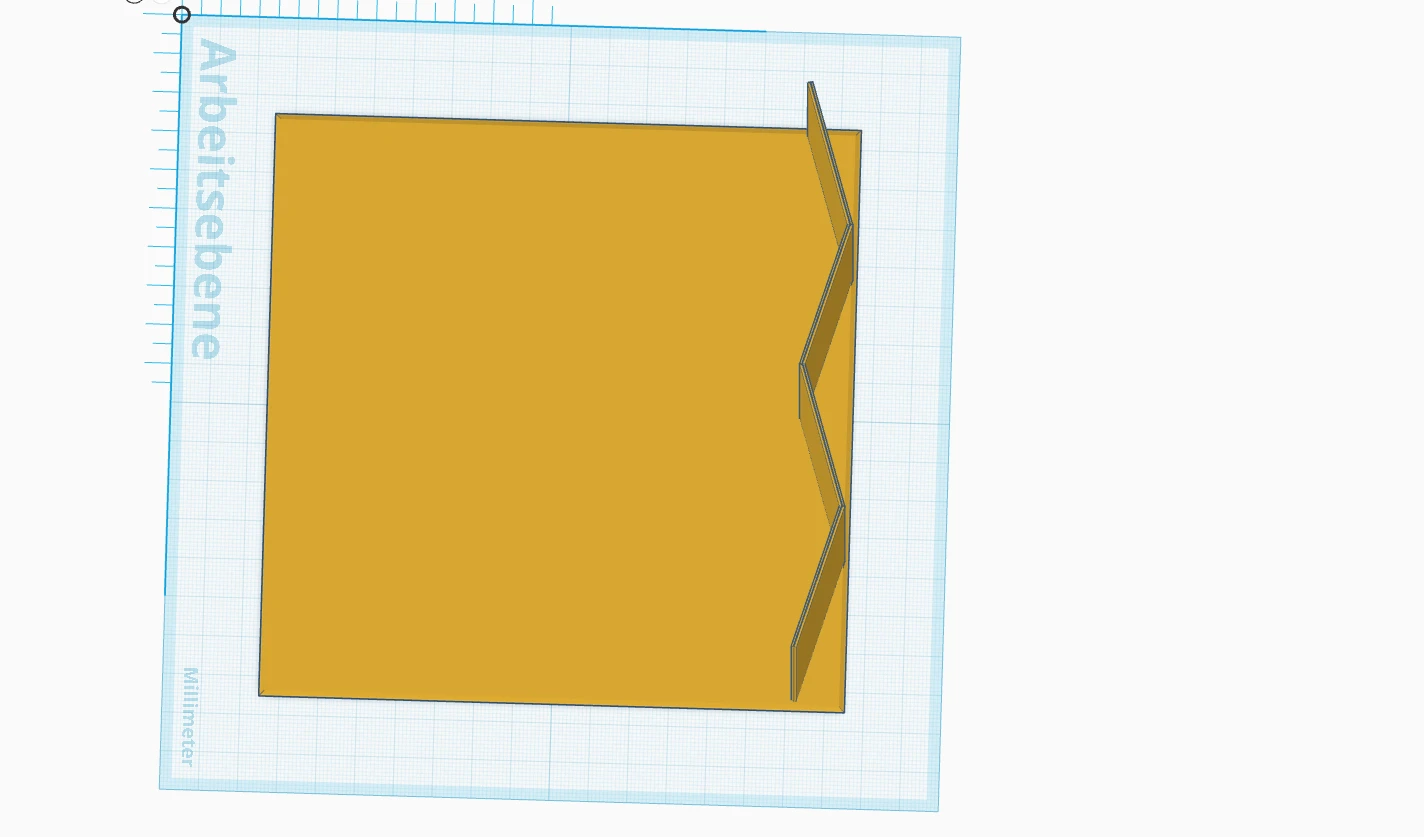
Folding screen with base
After printing it, I covered the upper surface of the base with some structured origami paper that looked like snake skales and then I covererd the backdrop in the same gold color I used for the coins and mallet. It looked great, but there was still something missing. I wanted a Sumi-e style painting on the folding screen, but there is no way, my hands are skilled enough to paint in that scale free handed. I designed a graphic for it in photoshop with a nature scene and a torii gate. In the corner I put three kanji that hold a special meaning in the Heki Ryu school: Kan Chu Kyu (貫中久)4. Then I printed it on water transfer sheets for model making. Those can be made soft by submerging it in water and then adding it to the piece and sliding off the backing paper. I did the same to add a tiny inscription on the ema.
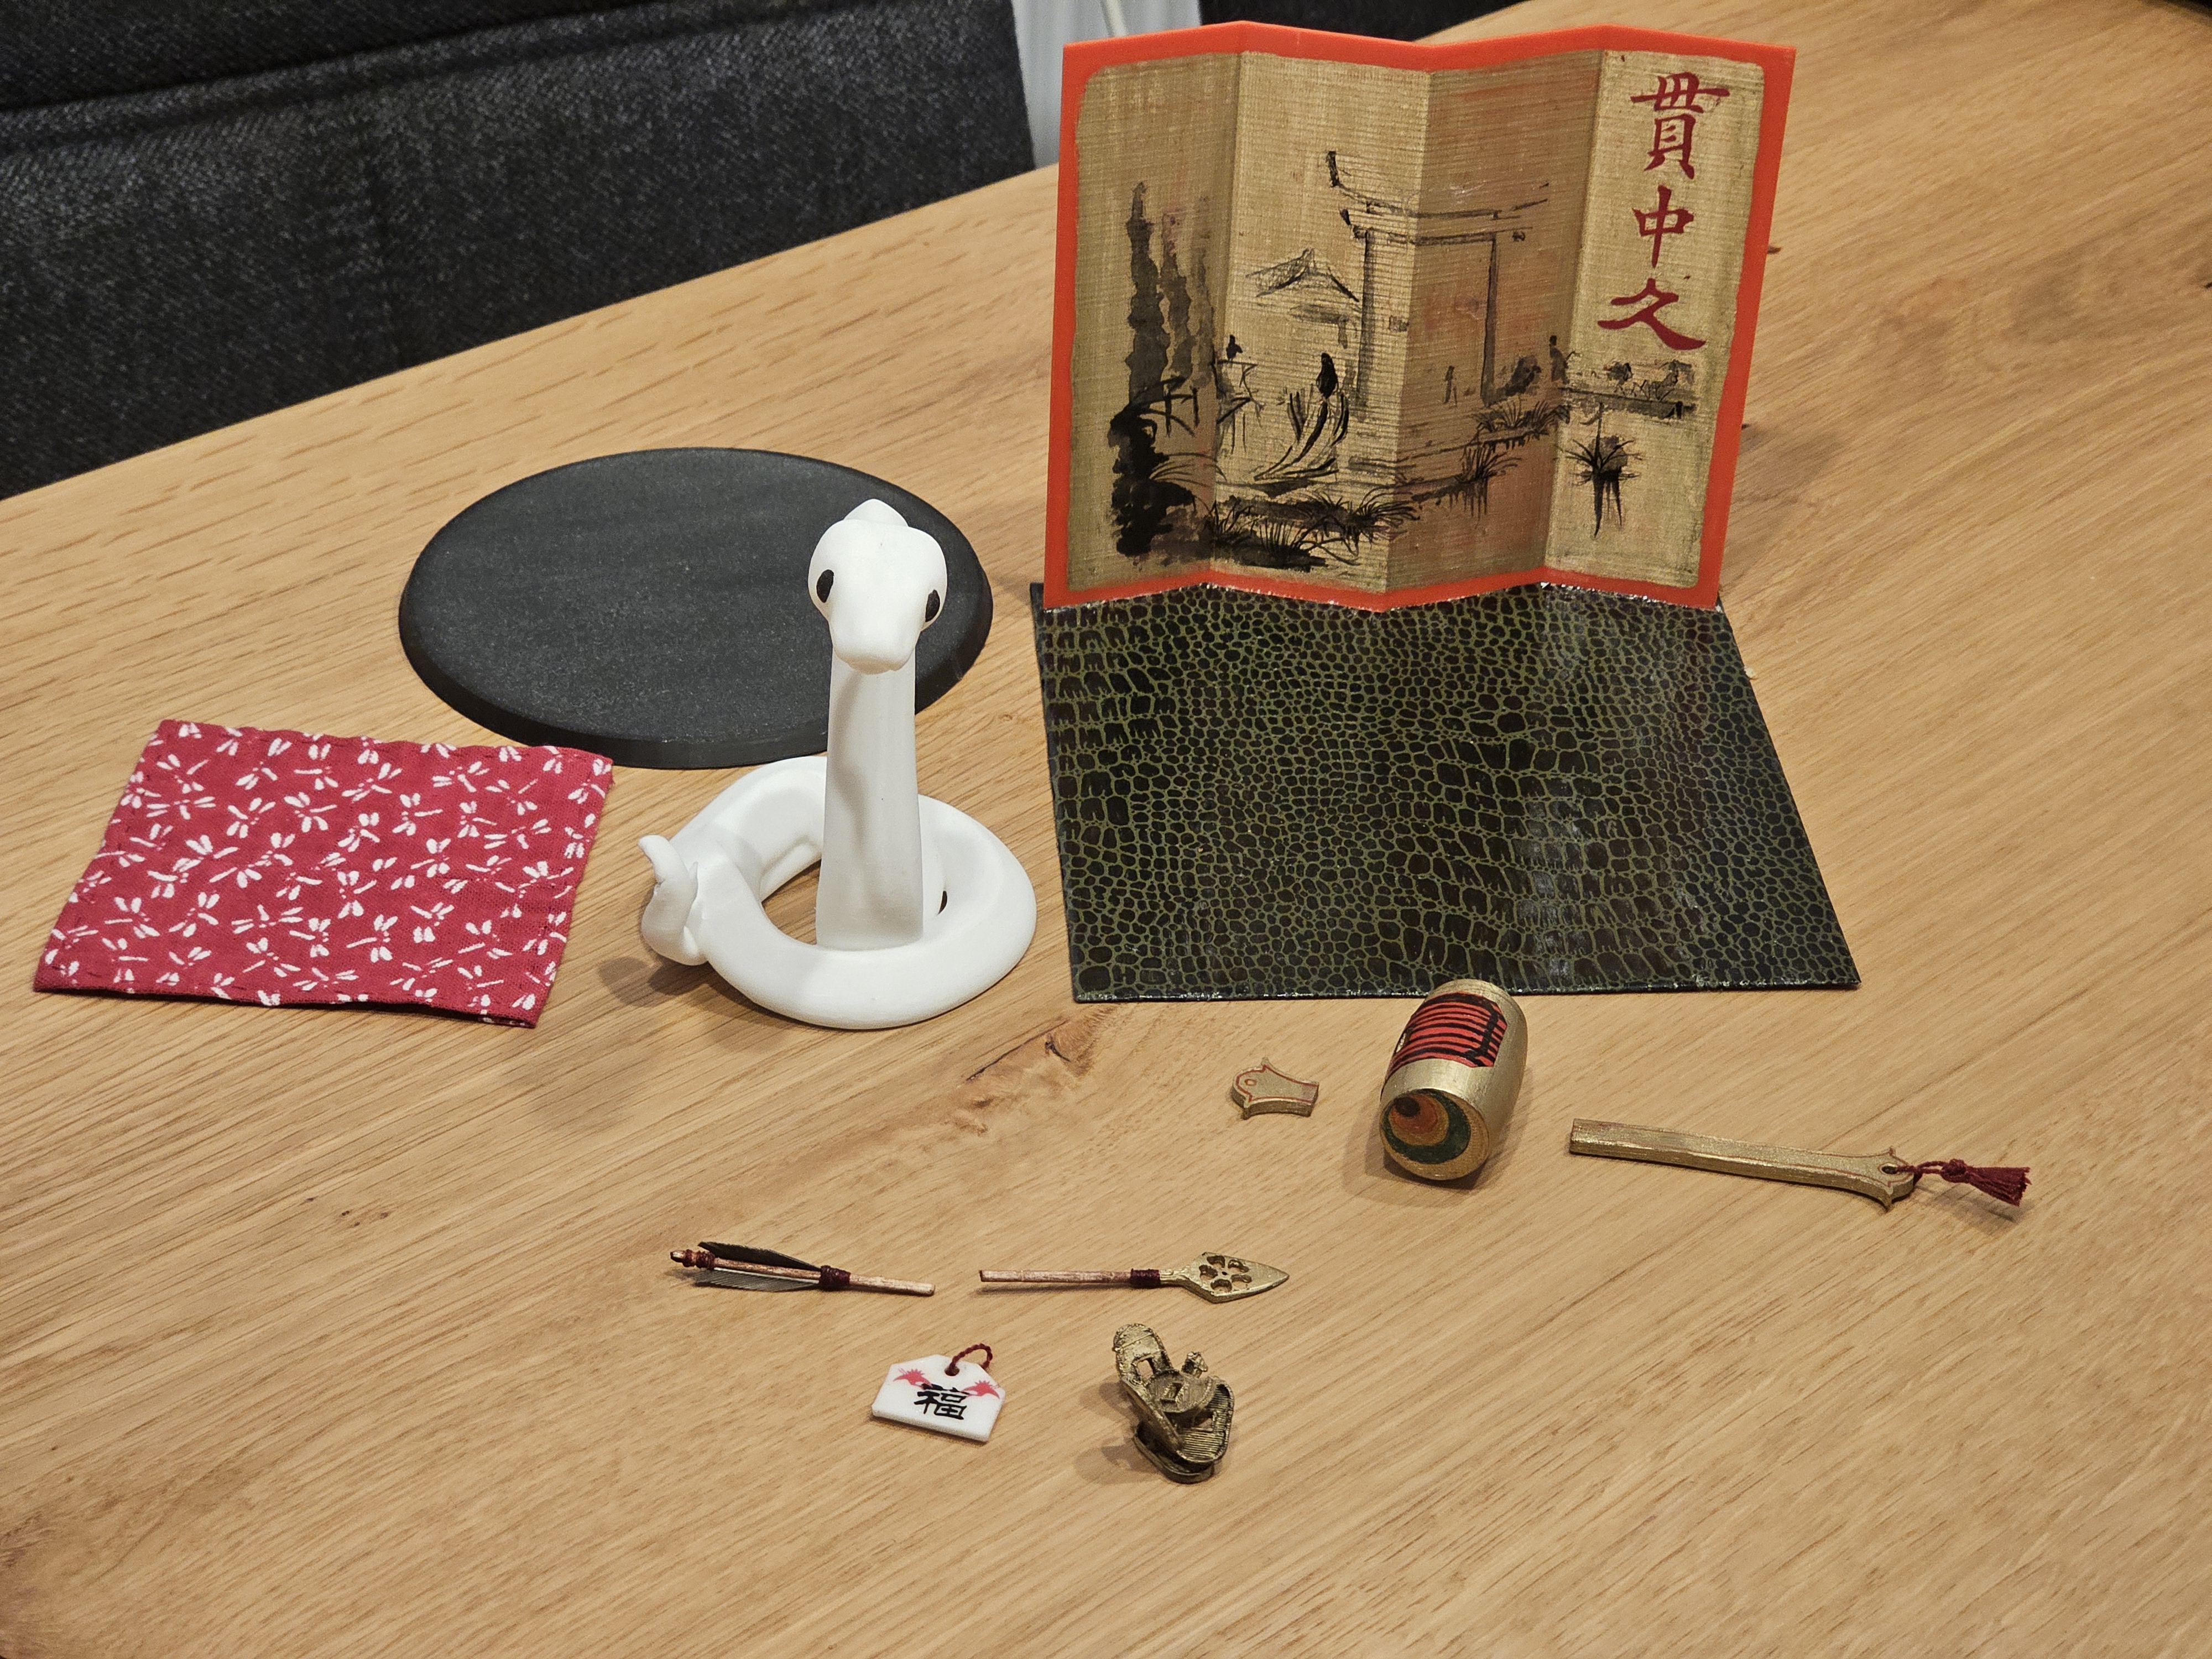
All pieces laid out
Done, I thought. But I was worried. The shape as it is invited picking it up by the backdrop - a thin piece of plastic only attached to an even thinner piece of plastic ground plate. So I cut a piece of balsa wood and glued it to the base after making some inscriptions with a wood burning tool. The snake was done and it come out great.
If you want to make the snake yourself, the files can be found here: Link
The files are not plug and play - You will have to make the same or similar changes to it to make it work for you. If you make a version of it, please let me know. I look forward to seeing what people will come up with.
-
Sukashi Yajiri ↩︎